Pages

Showing posts with label Rubber Stamped Cards. Show all posts

Sunday, June 19, 2016

Longing for the Sea Card


Items Used: (Card size: 5 1/4 x 7 1/4 inches)
  • Golden Peach, Green Silk/Satin card
  • Spectrum noir Watercolor pencils
  • Heartfelt Creations Under the Sea stamps and dies
  • Trimcraft First Edition Leaf Die
  • Graphic 45 Sea themed paper
  • Tonic Frame Die
  • Dried star fish and sea dollar (Michaels)
  • Hot glue
  • Light green pearls
  • White card for card base
  • Anna Griffin swirl (gold and white) with a gold heart (I had this as a leftover and added it behind my turtle.)
Hi everyone!

I purchased the Heartfelt Under the Sea collection with the dies and stamps.  Its SO pretty!  I used watercolors to color my stamped items and then die cut them.


I didn't have any seaweed so I used some die cut leaves. I think they came out ok.

Thanks for stopping by,
Lis

Tuesday, May 10, 2016

Birthday Butterflies Card

 Hi all,

Today's card is a little different with a two-page front.


Items used:
  • Patterned paper -  Maja Designs
  • German scrap - gold border
  • Paper Tole Butterflies and frame - Hot Off the Press
  • Gold Foiled Acetate - Kanban (Create and Craft)
  • Rubber stamps - Hampton Arts
  • Red line or wonder tape
To make my card:
  • I covered my card front (card measures 5 x 6 1/2) with patterned paper
  • I prepared my acetate so that I could put it on my card without attaching it so that I could position the gold foil borders correctly
  • I added the vertical gold foil border
  • I stamped the tea pots border with distress ink in dark purple
    • I stamped the tea cups so that the paper tole would cover them.  The person receiving this card (my sister) will open the first page and see the tea cups.
  • I added the horizontal gold foil border

  • I stamped the inside with a sentiment "Where there is tea there is love"
  • My last step is attaching the acetate to my card
To make the acetate layer:
  • I took a piece of acetate and added about 3/4 inch additional (horizontal measurement) to the size of the card.
  • I scored it on the left.
  • I added red line tape (very sticky and strong clear double sided tape) to the back of the small scored side (left)
  • I added this to my card and attached it to the left backside. (NOTE: I did this AFTER I finished the card front.)
  • I added the paper tole to the right side of the acetate

 Here you can see the effect of the acetate with the card front.


Thanks for stopping by,
Lis

Monday, May 9, 2016

Thinking of You Card


Hi all,

Today's card is a fun style that I like to make every now and then with washi tape.   I took a variety of washi tapes and started adding them to a plain white card (5 x 6 1/2).  I didn't weave them.  I just added and overlapped them.

Items:
  • Variety of washi tape
  • Fancy Foils Steampunk by Hot off the Press
  • Thinking of You stamp by Hampton Arts
  • Black StazOn Ink
  • Green jewels and pearls (Bo Bunny)
  • Gold Paint Pen
The balloon is from Hot Off the Press and they are called Foiled Fancies.  They are similar to Desden scrap or German foil scrap but are much more sturdy.  These are paper but are a sturdy 110lb+ so you can color them, sand them and so on. They have a silver core so you can get a lot of different effects from them.
(The picture above doesn't show the gold very well.  It looks washed out but it is a rich gold color.)

I stamped the sentiment onto some collage paper and then cut it out and edged it in gold.

Thanks for stopping by, Lils


Saturday, May 2, 2015

Flower Thank you Card

hi everyone!  I am starting to do more stamping of late.  Good thing!  I have so many rubber stamps and many are just beautiful. So, I want to start using them again.

Today's card is using a really pretty flower stamp that I colored with Spectrum Noir colored pencils. (Yes,  couldn't help myself. I bought a set.  I do love colored ANYTHING.  The more colors, the better. I love new tools, new colors, LOL....yikes!)


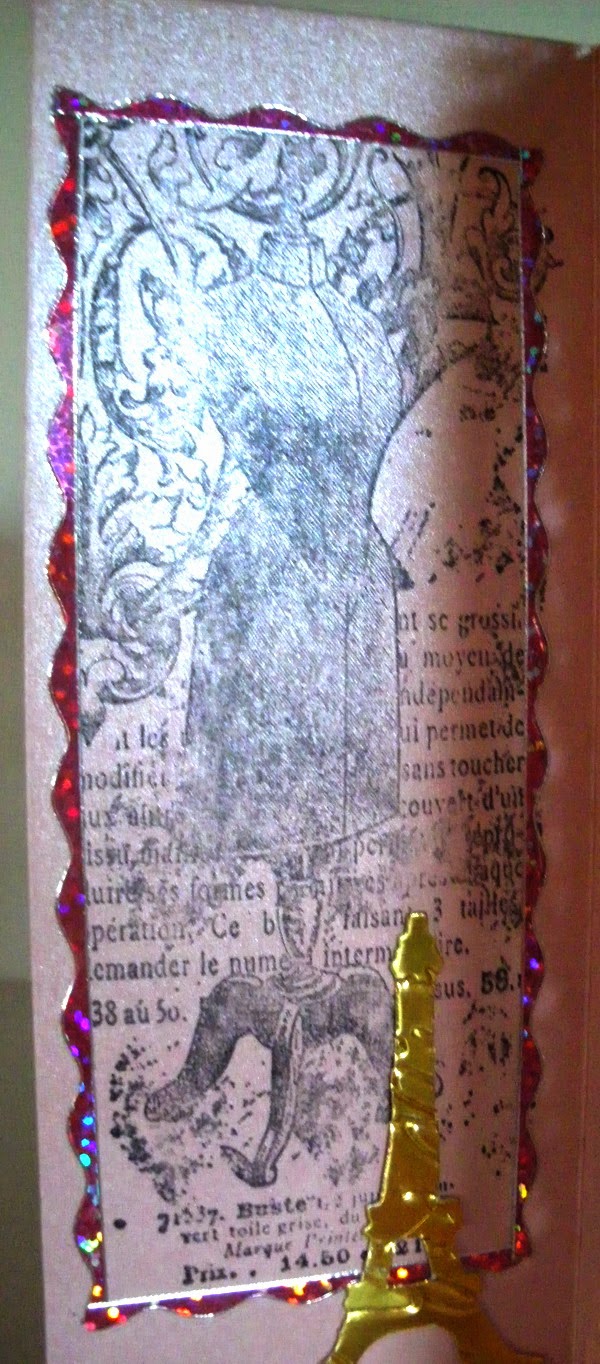
I used a pink for the overall color of the flowers and then colored the base with a darker red and blended them.  I used a single green for all the leaves. I didn't color the vines.

I used Distress Inks in Tea Dye and Old Paper to color/edge the paper of my stamped piece (which was on ivory card stock).  The THANK YOU is a separate stamp that I got for a dollar at Michaels.

I used a gold pen to add gold splatter to the image once I was done.  I distressed the edges and then mounted to my card base which was also ivory.  You will note that I curled two of the corners (see upper left).

I covered my card base with two papers: red foil and at the bottom a foiled cheetah pattern.  Yes, I sure did go out on a limb with these choices, didn't I?  But I thought they were lovely together.

I added a red/pink striped ribbon/organza as a final touch.  If you look at the right side I cut out two short lengths of the ribbon and cut a "v" in them and added them on top of the ribbon strip as a layer.


This stamp would look good as a circular pattern because of the way the stem is designed.

Take care, Lis

Saturday, November 29, 2014

Butterflies of Time Card


My card today uses my new favorite Frantic Stamper precision Die - Petite Butterflies!  I love this die because I can cut three sizes of butterflies with one pass and they are stackable!  What's not to love!  (They are just the right sizes for cards too!)
 
 
I had some extra strips of card stock and decided to weave them together to see what I got.  I liked it so much that I stamped it with a La Blanche stamp.  I added a few stacked butterflies to decorate. I was debating whether to use some pearls on the butterflies but they were so pretty by themselves. The embossed silver shimmer paper added a really fancy background for the butterflies.


Saturday, September 27, 2014

Thinking of You Card


I wanted to send my sister a card just to say hello.  I don't get much of a chance to speak withe her because she's in New York and I'm in California!  My sister loves nature and has a dark green thumb!  I also wanted to try out some watercolor pencils that I bought and I thought this rose would be just the thing.

I saw this pretty scrapbook paper with a line rose on the side and thought I'd use that. I roughly colored the rose and leaves with the pencils (dry) then used a paintbrush (comes with) and plain water to fill it in, blend and smooth.  It was very easy.

I love burlap -it has such an interesting texture (and I love the brown color) layered burlap on one side and  and added the Frantic Stamper dies branch and bird.


I added some green crepe ribbon to match the leaves.


Sunday, August 3, 2014

Four Panel Card: French Boudoir


Today is my second four panel card.  I think I am getting addicted to these, they are so easy to make!   A you know I love all things French, so this card is full of "Frenchness"! LOL

The dies for the Eiffel Tower and the shield come from Sizzix/Tim Holtz Movers and Shapers dies. I used an embossing folder from Cuttlebug for the embossing on the shield.

I decided to make this card one color on the outside (silver) and pink shimmer in the inside. (I once saw a movie in high school that was from France and I remember all the decoration wallpaper in the apartment.)

Anyway, this is the outside.  I used a Frantic Stamper precision Die (its a half panel die - Shell Half Panel Die).  I cut out the half panels in plain white card stock and sandwiched them between the silver and pink shimmer card stock.  I used Jewel Border Dazzles for both sides of my card.  Silver on the outside...

 
...gold for the inside.  You will note that the first panel is rubber stamped rather than being a die cut panel like the rest.  I got the stamp from Frantic Stamper.  It is a stamp from France (how appropriate!) La Blanche Rubber Stamps.


This is the inside of my four panel card.
 
 
Now for something really CUTE!

Do you see the little charms that I have hanging from the gold punched design?  They are Dazzle CHARMS!  These things are just the cats meow!  They are Dazzle stickers and come on a sheet. You get a pair of each design.  You lace one of the stickers on one side of a piece of plastic and the other on the other side and then you can cut them out.  OR, you can just attach the stickers to each other. Each charm already has a little hole.  They come in gold and silver and I LOVE THEM! (Remember that you can color the silver ones any color you want with alcohol ink pens.)

Pearl Silver Dazzle Charms - Hot Off the Press

Pearl Gold Dazzle Charms - Hot off the Press


I hope you enjoyed my four panel French Boudoir card.  I am sure that I will make more four panel cards so stay tuned!

Lis

Saturday, July 26, 2014

Le Chat Noir


I love the art-poster type rubber stamps. Frantic Stamper has a really nice collection of them.  I have one called Chat Noir (black cat) that I wanted to use on a card.  Instead of stamping my image in black ink, I used VersaMark and white embossing powder on a dark purple card stock.  The white embossing powder was able to capture ev ery little detail of my stamp, even the tiny writing!  I colored the cat with Distress Stickles Glitter in Walnut Stain. 
I mounted my image on black suede paper and attached to my card base.


Thanks for stopping by!


Saturday, June 28, 2014

Time to Celebrate!

Today's card is a fun little card I made for a birthday coming up.  I have this ric rac ribbon that 've been wanting to use.  I decided to take it out and see what I could do with it. I've tried making bows with it but they've been ugly failures. SO - if anyone out there knows how to make a good bow out of thin ric rac, give me a holler!

I got this set of clock stamps for about $2 which is a BARGAIN!  The large clock is missing one of the numbers.  I didn't notice and I can always hide it with a pearl or something.  Hey, almost free stamps are great!
 
 
I decided to just crisscross the ric rac on my card.  I stamped a white background with green clocks and added the calendar with the date accented with a pearl. Yes I did curl one of the corners of the calendar.
 
 
Thanks for stopping by!
Lis


Saturday, June 7, 2014

Steampunk Butterfly Greetings


Hi everyone!  This was an interesting card to make.  I started off wanting a sweet Victorian card. I ended up adding a steampunk element to it.  Quite a mixture!

The unique material that I've just start using is the paper ribbon.  I've used it in pink on this card.  It starts out as paper twine (Maya Road).  I unroll it and the resulting paper ribbon is about 1 1/2 inches wide.  You get a lot on a roll too.

It does take a little patience to get it unrolled but well worth the effort. Its SO pretty.  I am working o another card and I want to ink it before I unroll it to see what tie die effects I can get. So stay tuned!

Do you like my butterfly?  I used a Frantic Stamper solid Butterfly die to cut the card base, the patterned paper mat and a gold glossy butterfly that you can just see on the inside of the card.

I stamped a gear image onto some transparency that I cut a bit larger than the butterfly window on the front of my card.  I used double sided tape to attach it to the front of my card base.  Then I added my mat (made from purple suede paper and patterned Graphic 45 paper on top).  My mat already had the butterfly window cut out.  I matched up the windows and glued it down.  The stamped transparency shows through.  I cut out a gold glossy butterfly to place on the inside of my card. When the card is closed, there is a gold background to the butterfly.

This is not a new technique but one that isn't used a whole lot.  Hope you enjoyed my card today!

Thanks foo stopping by!
Lis


Saturday, May 24, 2014

Happy Father's Day Card


Don't you just love it when the stars align and everything comes together to make a beautiful card?  This was that card for me last night.  I wish that all of my cards would come together so easily but sometimes I really struggle. 
 
Today's card is a pretty one using Prima flowers in burlap, some unusually colored leaves, some lace and a homemade banner at the top.  I even used some washi tape accents at the top and bottom.  I also put inside my card.


Don't you just love the leaf colors? I decided to start using different colors.  I saw that Prima had some different ones and I thought they were just so cool!  They really go well with my flower which a little on the drab side.

I love how my label turned out.  I used the same paper (K and Company) as I did for the mat on the card base.  I matted it on white and cut some white for the center and then stamped in black.  Do you like this tiny saying?  I found a set of Tiny Sayings stamps at Hot Off the Press (Paper wishes.com). I'm always looking for a great set of sayings stamps with interesting fonts and styles that I can use on small tags.


I added some lace that I've had lying around for a while (I won't admit how long!).  Take another look at my tag.   added one piece to it also.

Hope you enjoy this card and make some beauties of your own!

Lis

PS: I bet you may wonder why I've not made any Mother's Day cards.  My mom passed away a few years ago. It's still so hard to get by during any holiday.  I don't have any family of my own and I'm not married so its double hard.  I miss her. We didn't always get along or agree on everything but she was there for me.  She taught me the value of education.  She got a nursing degree and a four year degree in her 50's.  I carry a picture of her and me when I graduated college that I look at once in a while.  She was an amazing person.

Sunday, May 11, 2014

Thank You Card


I wasn't sure what to call this design. It reminds me of old Italian or Byzantine.  This is, of course, one of Tim Holtz' new Frameworks dies - called Trellis.  I really love dies that have designs tat I can play around with and change to my liking.  I can see the Frameworks dies being one of these.
 
I cut the framework out with some of the Tim Holtz paper stash I have.  I also cut it out of some dark purple and also out of grungeboard.  I used the little pieces from the purple ad the grungeboard to fill n the design in my card.
 
To prep the grungeboard, I simply added Tarnished Bronze Distress Stain to it. After it dried, I stamped some writing in StazOn Black.  If I had to do it again I would pick a stamp that had thicker lines as it's difficult to see my stamped image. One nice thing about the grungeboard is that its thicker than the surrounding paper, so it really adds a nice bit of dimension to my card.


I used glue stick to adhere everything onto a navy blue card base.  I added the blue bling last.
 
I colored my label (which was plain chipboard) and my ribbon (which was white) with Vintage Photo Distress Stain,  I also added some touches of the Tarnished Bronze to my ribbon.  It created a nice shimmer to parts of my ribbon.
 
I added a gold sentiment (Dazzles) and done.  I am thinking of changing this to a Happy Fathers Day card.  It has a nice masculine feel.


Thanks for stopping by!
 
Lis

Sunday, May 4, 2014

La Mode - an Arty Tag


Today I received a box from Fran!  And in that box was a set of new paints by Paper Artsy called Fresco Paints.  I had seen these on the site and really wanted them.  I think the word "fresco" drew me in...LOL.  
So, how to try out my new paints? I decided to make a tag with a paint background.  I chose some of the colors - some blues and a pretty cream color, got out my cosmetic wedges and pulled out some card stock.  I made my own tag (6 x 3 1/2 inches) this time because I wanted a larger size to work with.
I chose a few Frantic Stamper stamps to work with including a tag stamp.  Before I started painting I stamped my tag stamp onto some paper and made a mask and placed that on the bigger tag.
This paint is so nice!  It's creamy and covers really well.  The colors mix well also. I was able to blend while wet easily.
After I got my color background done, I stamped the shoe stamp randomly onto my tag.  I used the new Tim Holtz colors in Distress Markers to color my stamped shoe images.  I wasn't sure if this would work but it worked really well. The distress markers were transparent but you could easily see the colors over top of the paint which was very cool.  As my final step, I used the Pearl Glaze from the Fresco paints and applied a thin layer over my entire tag.  It was gorgeous!  The paint went on very smoothly and dried quickly. It left a really nice pearly shimmer.
To complete my tag: I removed the mask from the tag.  I cut some washi papers and added them onto my card with glue stick.  I had an old post card which I added to the bottom of my tag and then trimmed off.  I added some crochet ribbon to cover the seam.  I stamped La Mode (also Frantic Stamper) at the bottom on the post card.  I added Viva Decor Pearl Pen pearls to the smaller tag.  I added two colors of ribbon to the larger tag and fastened them with a small brad.
That was fun! 


Thursday, April 3, 2014

Mom is Love


Mom is Love - Coloring with Paper
by Lis Whiting

Today's card is a coloring project although it might not look like one.  I colored my stamp with papers!  This is not a new technique but one I wanted to get out of the back of the closet and dust off!
Tip: When selecting your stamp, choose one that has more outline.  This technique does not work as easily with solid stamps.
I started with a Frantic Stamper stamp of a picture of a woman with a dress that looked like the 50's to me. Frantic Stamper has a wonderful selection of Ladies for almost every time period.  I especially love the Erte group.  I stamped my image on heavy white smooth card stock in Staz-On Black. (Actually I did this several times. It gave me a couple of images to play with...you know...just in case I made a boo boo.)  I chose two patterned papers for my "coloring" and stamped the image on each of these as well.  I cut out the top part of the dress for a blouse on one and the skirt on the other. I cut out my full stamped image with about a 1/8 inch plain border around it.  I glued the blouse on with glue stick.  The skirt had a three flower design on it. I added pink carnations to that area first, then glued the skirt to my stamped image.
I chose a yellow card base and dark blue card stock for mats.  I chose a more plainivory colored paper to place my completed image on.  I finished with a crepe bow and the word LOVE attached with foam tape. I added some color to her hair with some Distress Markers. I added beige 2mm pearls to decorate.
I do hope that you give this a try. It's fun and you can use your scraps!
Thanks for stopping by!


Products used:

Saturday, March 1, 2014

Sara Bernhardt


Sarah Bernhardt - a Coloring Project
by Lis Whiting

I saw this Frantic Stamper stamp and thought it would be a beautiful front to a card.  I stamped the image wint Staz on black onto ivory card stock. 

I used chalks to color most of the image.  I colored the stars and did the lettering with Distress Markers.  I used gold glitter Dazzles for the border and matted the entire thing onto dark brown card stock.  My card base is a dark pink. (I have to say that I briefly questioned my sanity when I chose this card base...I wasn't sure it would work out but it works beautifully with the pink chalk accents on the image's cheeks and the flowers.)


Products used:

"Art is never finished..."


"Art is never finished..." - a Coloring Project
by Lis Whiting

I've been wanting to use some transparency with my work and I thought this would be a good opportunity.  I like to work with transparency (the kind you get at Staples - nothing special).  It's a challenge working with it and getting it to combine with a card.
I stamped my images on my transparency (4 x 5 1/4 inches) in Staz-On black on the front.  It's important to use this because regular inks won't dry on this non-porous surface. 


I set the stamped piece aside and worked on the "coloring" of my background.  I am currently using Paper Artsy Fresco acrylic paints. 


I used a craft mat for this.  I chose three colors and, starting with my first color, I squeezed out a little bit onto my mat.  I used a flat paint brush and painted the top portion of my white card stock with my color.  I did the same with the next two colors, working my way down the card stock and blending the edges as I went.  I didn't want a "perfect" look so I was not too careful with my painting, allowing some white from the card stock to show through.  I edges my background in Vintage Photo.
I attached the transparency to my painted background with adhesive sheet.  Since I was not attaching my transparency with brads or staples, I needed an all over adhesive that wouldn't show.
I added a ribbon to the front of my card and used a lavender card base.
Thanks for stopping by!


Products used:

Grapes


Grapes - a Coloring Project
by Lis Whiting

I had this beautiful grapes and leaves Frantic Stamper stamp and have been holding onto it for a while. I finally decided to use it but wasn't sure how I was going to fit it on a card.  I started by stamping it with Staz-On black on plain, smooth white card stock.  I stamped another image just in case I needed it (turned out I did).
I just got the new Ranger Distress Marker colors and I've been dying to use them.  I started by coloring the leaves with Mowed Lawn and the grapes with, what else, Seedless Preserves.  I colored the centers of the leaves darker and then spritzed some water onto a paper towel and dabbed off some of the color. This is how I got the shades on my leaves.  I also used Picket Fence on the grapes (just a few lines on the center ones).  I also dabbed off some color on these as well.  I cut out the first image that was completely colored and set it aside.
I colored one leaf and most of the grapes on my second image, using the same technique.  I cut out the leaf and cut out the grapes in two sections.  I layered the leaf and the grapes onto my other image with foam tape to create a paper tole-like/3D image. I edged my leaves and the stem with gold.

To create my card, I used some pink suede paper and die cut the On the Edge Doily pattern (Tim Holtz).  I also punched out a pattern with EK Success punch.  Lastly, I used some gold foil paper to add to my card.  The layers are (from top to bottom) patterned paper, suede paper, gold foil. I attached the grapes and leaves with glue stick.


Products used: