Pages

Saturday, July 20, 2013

A Little Christmas (Card) in July!


Last year I didn't get into the Christmas card making spirit until after Christmas.  This year I am happy that my muse has decided to cooperate!

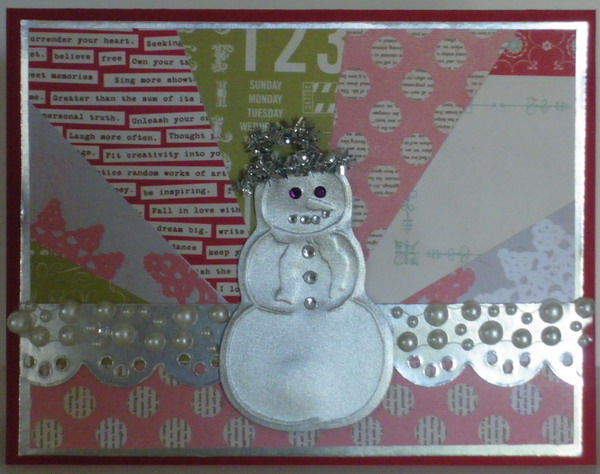
I hadn't planned on making a Christmas card but I was looking through my stash and found this silver snowman sticker. Although the papers I used aren't holiday papers, I think they are ok.  I love how the pink works with the red.

Since I was working with heavier card stock this time, I only chose five papers.


Close Up!

I like the way the white pearl string worked out for this card.

I made the little hat out of a silver pipe cleaner.  The first one I had was way too big! A little trimming and I called it good! I added a few acrylic gems to mimic ice.

Thanks for stopping by and come back tomorrow for my final card.

Lis


Friday, July 19, 2013

Sunray or Sunburst Card Technique

This weekend I wanted to share a technique/design that I learned from a stampin' Up website (Stamp and Scrap with Frenchie).  The design is a sunburst or ray design, not a new design but very pretty.  The trick is to cut all of your papers at the same time so that they fit back together well.

These are the steps I took:
  1. I selected the size car I wanted to make and the orientation (4 1/4 x 5 1/2, portrait)
  2. I decided that the "rays" would cover 3/4 of the card. this means that the innermost mat would be about 3 1/2 x 4 inches.
  3. I chose my patterned papers, and cut all of them to 3 1/2 x 4 inches.
  4. For the card below, I had 6 different designs.  They were all paper so they were thin enough that I didn't have trouble cutting them.
  5. I laid the stack of papers on my cutting mat and found the bottom center of the paper stack. This is important because this is where I would place one end of my ruler. I used an xacto blade and a ruler to cut them.
  6. I started out on one end. After I cut each piece I placed it to the side so that I could keep them in order.
  7. Once I was done cutting, I took one piece from each cut stack and made my design.
  8. I ran a white card stock piece through my xyron to coat it with glue.
  9. To place my pieces on my white car stock, I started at a corner and built it out from there.
  10. I chose a coordinating piece of paper for the bottom portion of my card.
  11. Once I completed my design, I trimmed it (which is why it looks so perfect below).  Since this was my first try, my papers ended up a little...shall we say...crooked? I used to take classes back in North Carolina.  Whenever one of us messed up a card, we always said "sample card!"
The fun part of this card was the decorating! The focal point is usually where the design comes together at the bottom but on my third card (which you will see on Sunday) I didn't do that.


Close Up!
Here is my design, completed.


Here is another look at my finished card.


Come back again tomorrow for another example!
Lis


Sunday, July 14, 2013

Fantasy Flowers Part 2


Hi and I hope you are having a good weekend -keeping cool at least!  Here is my second fantasy floral card made with molding paste and a stencil.  Today's card is misted with blue Delusion spray.  The design sits on a dark brown card stock and matted on blue with a white card base.


Close Up!

I added gold pearl swirls under the purple/blue ribbon.  Instead of pearls like my first card, I used baby blue jewels (and a few dark blue) and some lime green for the leaves.

This picture gives you a good idea of the thickness of the molding paste.  It is a little rough around the edges.  Stencils are thin and I wanted to see if I could get a thicker stenciled design by spreading a thicker coat over the stencil.  I was successful...to a point.

Remember that all kinds of things can be used for stencils.  You can punch a design in a heavy cardstock and use that as your stencil.  I've done this and it worked really well.

Hope you liked my cards this weekend!

Lis