Pages

Showing posts with label New Materials to Create With. Show all posts

Tuesday, December 6, 2016

Father Christmas - a card

This is my favorite card so far for this season.  I love the shape of the card and the contrasting white with dark green foliage.


 Items used:
  • card base - white card
  • die used - Tonic
    • Tonic has these "verso" dies where the pattern can be cut into the card rather than out of it as a separate piece. This is what I used to get the opening on the front of my card where the red from the inside of the card shows through.
    • This particular set also comes with the outer dies that cut the shape.
  • The die for the green foliage - unfortunately I cannot remember.  I believe that I got it at Paper WIshes.com.
  • Paper Wishes - embossing folder for the front of the card
  • stickles glitter glue for the centers of the embossed areas
  • forest green suede paper for the foliage - Paper Wishes
  • gold flowers - michaels
  • gold glossy and red glossy card
  • image - This was cut from a 12 x 12 paper.  I cut the image itself down also to fit the size I wanted for my center.  I was able to meld two parts of the image to make it look like Santa was holding the bag.  In actuality the bag is at his feet in the original image.  Pretty cool, huh?


Here is a great close up of the green foliage.  I love that the suede paper was embossed.  The embossed parts look lighter in color but in fact it is the same piece of forest suede paper.


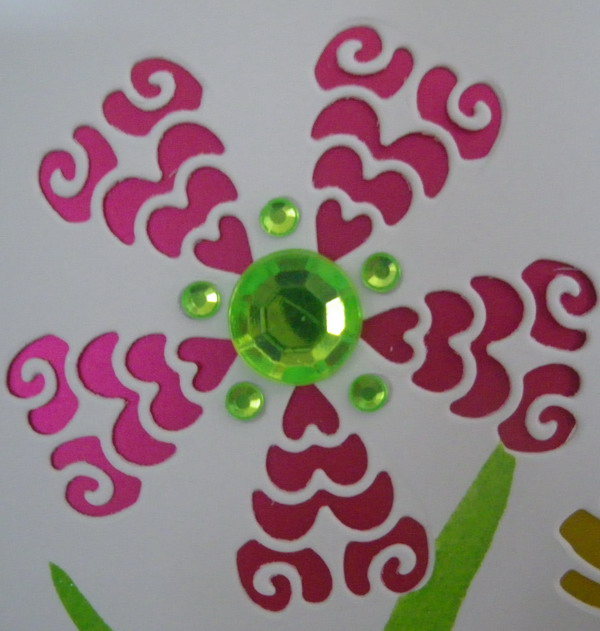
Here's a look at the embossing I did and the addition of glitter.

Thanks for stopping by!
Lis

Monday, May 30, 2016

Three Flowers Card

Items Used:
  • Tonic Verso dies
  • Spectrum Noir Sparkle Pen-green
  • Green gems
  • Drab green organza ribbon
  • White card
This is actually a brightly colored card.  I think I didn't get enough light on my card to get a decent picture.

I just got some "verso" dies from Tonic.  These are dies that can cut into the paper or cut out something from paper.  I was really intrigued by the former so I got a set from Create and Craft (my new favorite channel to watch).

I cut the flowers into the card and backed them with silk foiled card in different colors. (Tonic gives you an outline die in case you want to cut the flower out and have a die cut.  The dies are fairly intricate.  They cut very nicely.


I didn't do a very good job making leaves though...LOL.  I should have cut some out instead of trying to paint them on.  I have a pretty picture in my mind of what I want to do  - sometimes the hands don't follow the mind!

A last look...

Thanks for stopping by!
Lis

Tuesday, May 10, 2016

Birthday Butterflies Card

 Hi all,

Today's card is a little different with a two-page front.


Items used:
  • Patterned paper -  Maja Designs
  • German scrap - gold border
  • Paper Tole Butterflies and frame - Hot Off the Press
  • Gold Foiled Acetate - Kanban (Create and Craft)
  • Rubber stamps - Hampton Arts
  • Red line or wonder tape
To make my card:
  • I covered my card front (card measures 5 x 6 1/2) with patterned paper
  • I prepared my acetate so that I could put it on my card without attaching it so that I could position the gold foil borders correctly
  • I added the vertical gold foil border
  • I stamped the tea pots border with distress ink in dark purple
    • I stamped the tea cups so that the paper tole would cover them.  The person receiving this card (my sister) will open the first page and see the tea cups.
  • I added the horizontal gold foil border

  • I stamped the inside with a sentiment "Where there is tea there is love"
  • My last step is attaching the acetate to my card
To make the acetate layer:
  • I took a piece of acetate and added about 3/4 inch additional (horizontal measurement) to the size of the card.
  • I scored it on the left.
  • I added red line tape (very sticky and strong clear double sided tape) to the back of the small scored side (left)
  • I added this to my card and attached it to the left backside. (NOTE: I did this AFTER I finished the card front.)
  • I added the paper tole to the right side of the acetate

 Here you can see the effect of the acetate with the card front.


Thanks for stopping by,
Lis

Sunday, January 17, 2016

Love You Card with embossed satin card stock

Hi everyone,

I was going to use this card for Christmas but I never quite got to it.  So,  here it is for Valentine's Day in a non traditional green and gold.
 
Items used:
  • Gold satin card stock
  • Embossing folder- Anna Griffin
  • Green Crinkle ribbon
  • Kaiser Craft paper and tags
  • green card for card base
The satin card really picks up the embossing.  The picture doesn't do it justice.  There are no cracks or tears either.  The color is a very pastel gold.

Thanks for stopping by!
Lis

Tuesday, December 15, 2015

Christmas...a card

Hi everyone!
 
Today's card is using a new discovery for me in paper.  It's called satin finish (I'm sure that I'm the only one who didn't know about this...LOL)  I hope you get an idea of what this beautiful paper looks like (actually its card stock).  The finish is a brushed satin/shimmer look but without the sparkle of shimmer paper.  The color and finish remind me of the same on glass Christmas ornaments (not the shiny ones).
 
 
I made this card for a stamping friend of mine.


Items used:
  • Create and Craft Satin Board (comes in a package of 30 - click HERE)
    • Bold Colors in blue, red and gold
  • White card stock for the card base
  • Tattered Lace snowy corner die
  • Hot off the Press Paper Artist Dies -Christmas ornament and word
  • Bow - Anna Griffin (from a kit I have)
  • Bo Bunny blue crystals


Here's a look at the corner die cut (sorry for the blurry image).  I added blue gems to the snowflake centers.  I love the distressed look it has.


Here is the ornament.  I cut out the ornament and then glued it onto the red satin board and cut it out.  Then I foam tape mounted it onto my card.

Thanks for stopping by.

Lis

Thursday, October 8, 2015

Spooky!

Hi everyone,
Today's card is a Halloween card of course but what I am so excited about is the material I used to create my ghosts!  Take a look!


The ghost on the left was cut from Vertigo Film!  I believe I used Pebbles pattern.  Vertigo Film is a plastic with various types of patterns in it.  This one was perfect for my ghost on the left.  Vertigo Film cannot be cut with the thin dies.  I cut this ghost from a BIGZ Die from Sizzix (one of Tim Holtz releases for 2015).  My other ghost on the right was cut from regular white translucent vellum.

Items used for this card:
  • Sizzix Bigz dies by Tim Holtz (Jack o Lanterns, Ghosts)
  • Sizzix Tin dies by Tim Holtz (Handwritten Halloween)
  • black and orange card stock
  • The mat black with silver foil chandeliers is from Hunky-dory (UK)
  • Black crinkle ribbon (Reasonableribbon.com)
  • Vertigo Film (Pebbles)
  • White Vellum
  • Silver linen card stock (Hot Off the Press).

I love the way the vellum and vertigo film look like ghosts.
Vertigo Film
 Vellum
 
They are good together and look dimensional.


I like the word on top of the pumpkin.  After I cut the pumpkin, I cut out a backing piece of black card stock and layered the two.

Thanks for stopping by!

Lis

Wednesday, September 30, 2015

Paris Postcard


Hi everyone!

Today's card has a couple of interesting things on it. 

Items used:
  • Paris Postcard replica
  • Photo from Idea Ology Photo booth set
  • Blue sparkly ribbon
  • clear micro beads (for stamp)
  • double stick paper and clear glitter (Ranger) - see bottom of card
  • Other image cut from scrapbook papers
  • light blue vellum for mat

For the stamp:
I took some double stick tape and covered the stamp which was part of the postcard.  I covered the tape with clear micro beads.

For the bottom of the card:
I used some paper size double stick (paper) and cut it out and placed it on my card.  I sprinkled the clear glitter on it.  It looks really pretty and you can see the picture behind it.  This glitter gives a nice sparkle without being too opaque or overwhelming.  For those of you who grew up in snow like I did, it looks like sparkly snow in the moonlight.

Thanks for stopping by!
Lis

Sunday, September 27, 2015

Wicked!

Hi everyone!

I am a fan of Edgar Allen Poe's stories and poems.  When I saw that there was a brad with his portrait, I had to have it and use it in a card. 
I decided to do a collage card for Halloween.


Items used for this card:
  • Idea Ology (rub ons, brads, "wicked")
  • Authentique Halloween papers
  • Spiderweb embossing folder (Tim Holtz/Sizzix)
  • Purple Stardream shimmer card
  • Bazzill card stock in Orange
  • Enamel Accents in Black (for Wicked)

Thanks for stopping by!
Lis

Monday, July 13, 2015

Celebrate the Little Things


This is a 6 x 6 card - white card base.  The technique I am using is a heart stencil with glitter texture paste for the hearts.  After I let it dry overnight, I added the Dazzles red holographic round stickers and the borders.


I chose to use a light red vellum that I cut into three banners.  I used my Xyron to add the glue to the back and then added to my card.  I added the white saying (Hot off the Press) and a couple of white stars tat came with the package.

Thanks for stopping by, Lis

Wednesday, July 1, 2015

Time to Fly ....a Card

Hi everyone,

I love this card!

Techniques used:
  1. Shaker Card
  2. Stenciling with glitter paste
The shaker part of this card was easy to do.  I thought I was going to have trouble cutting the acetate to size and then adhering the foam tape without it showing.

Cutting the acetate:
I cut the clock using a Tim Holtz die.  I used the center die cut from the clock die as my template for the acetate.  I placed the circle on the acetate with temporary tape.  I cut a 1/8 inch border around the circle (cutting it larger than my template).  The acetate was a great fit and slightly large so tat I could glue the acetate to the clock with Gloss Accents.  I cut thin strips of mounting tape. Each strip was the circumference of the inner circle.  The strips were thin and I was ale to bend them around the circle without having to cut infinite pieces.  I made two layers.

So, I have the clock upside down on my craft mat.  I added the small hour hands to the inside and also poured in a little Diamond Dust.  I picked up my card and laid it down on top of the clock to seal it. (If you try this remember to be sure that your card is going to open the right way.  Keep track of your top and bottom!)


I added the large hand to the top of the acetate and added a blue jewel.


The stenciling for the background of my card was interesting. I haven't done a lot of stenciling.  I love the effect I get with the modeling pastes.

I wish that you could see this card in person.  I used a Cosmic Shimmer Texture Paste by Crafters Companion.  It is a glitter paste (not glue).  It is SO sparkly!  The one I used on this card is called Icicle Blue and is a blue interference color - which is why I chose black - because interference colors show very well on black.

I added the kite as an after thought.

Here's a good picture of the shaker box.


Thanks for stopping by - have a great week, Lis

Saturday, January 10, 2015

Round the World...a card for travelers!


I love maps. I love to use them as part of a collage and also for cards. When I saw frantic stamper's Earth dies, I had to have them!  One die is a regular die which cuts out an Earth "map" of the western n eastern hemispheres.  The other die is a reverse die which cuts out the detail within a piece of paper but does not produce a separate die cut.
I chose several papers that would work with my dies including handwriting, newspaper adverts and a pretty collage piece I used for my background.
I cut out the detail of the Earth using the reverse die in the center of my newspaper advert paper.  I used mounting tape to add this to the green handwriting paper, taking care to add mounting tape beneath the continents so they would be supported..  I cut another Earth using the regular die out of embossed gold foil on card stock.  I glued this onto my detail image.
You may have noticed the chain at the top and bottom of my card. I used a Sizzix die for this (Sizzix Original Die - Chained) and used white shimmer paper.
I hope that you will consider these dies for your cards too!


*** Materials for this project are available at www.franticstamper.com. Frantic Stamper Products Used:

Sunday, January 4, 2015

I Heart Paris


I love everything French.  I don't know what it is about Paris but perhaps the romance and history do it for me.  That is what inspires my card today.  I love to use recognizable images in my cards so that the meaning is evident.  The Eiffel Tower is one of those that evokes Paris.  I used the heart lock die from the keys set (love that set!).  Although the lock does have a fancy cut out, I kept that in place for this more solid look.
You will notice that the metallic gold foil background is embossed with a Texture fade from Tim Holtz/Sizzix (Eiffel Tower and French Script Set)  Its a perfect match for the French feel on the card.  I also used Fleur de Lis Rectangles by Spellbinders.  Again, another match made in heaven! 

My card base was white, onto which I matted another piece of plain card stock which I colored with Distress ink in Vintage Photo.  I also distressed it.  You will notice what looks like strip of paper at the bottom.  It is actually washi tape (called POSTAGE) from a company that I cannot remember (sorry about that but it has postage marks randomly on it with a couple in silver foil). Little B Stripes Red/ Blue/ White would also go perfectly with this as these are the colors of the French flag.

At the top of the Tower I added the tip of a snowflake.  It looks like a beaming light! You never know what you can use your dies for!
Thanks for stopping by!  I hope you enjoyed my card!
 
Lis


*** Materials for this project are available at www.franticstamper.com. Frantic Stamper Products Used:

Saturday, January 3, 2015

Americana Rooster


One of the many things I love is Americana.  I love using rustic reds and blues in my work. Today's Americana piece features a rooster, symbol of the farm (my parents families were both farmers).
I chose to use a combination of light blue plaid and blue foil (like a Williamsburg blue) for my card.  I used the sticker foil for the bottom inside and then did a cut away for the front of my card using a scallop edge. I added blue plaid ribbon and two ribbons from French General (EK Success).  Although the line is called "French General" it has some really pretty lace and ribbon that fit perfectly with my Americana theme.  The red buttons are also from the French General collection. 


I cut out my label using the Coved Labels from Frantic Stamper from a red stripe paper I had.  I outlined the label in silver and added it to my card with mounting tape.

I cut my rooster from Wood Veneer paper (by Arc Crafts-paper backed).  It cuts like a charm.  I used Distress Stain in Walnut (Ranger) to color my rooster and also used Vintage Photo (also Distress Stain) to edge it.  I threw water droplets on it and dried it again to create the worn look you see.  I attached it to my red stripe label with mounting tape.


Now my card is all ready to send to my dad in New York!

I hope you enjoyed my card today!
Lis

Sunday, November 30, 2014

Butterflies in Flight


Today's card is inspired by the many butterfly paintings, cards and art projects that I'm seeing in the web.  I love all the butterfly cluster projects. Butterflies are so feminine and delicate.
I started by using Frantic Stamper's Petite Butterflies (. I love this die for two reasons: 1-everything is on a single flat die which means I can't lose little pieces, and 2-there are three sizes of butterflies!   I die cut my butterflies using blue sticker foil. I prepared the sticker foil by adding it to plain card stock and then embossing it.  I cu two sets of butterflies. I didn't use the butterfly bodies that are also on the die (how nice!).
 
To prepare my card, all I did was to choose a pretty blue pattern paper (DCWV) and cut another card panel (Daisy Circles) out of white shimmer paper.  This was layered onto a white card stock base.
 
I arranged the butterflies, largest at the bottom and smallest at the top, few at the bottom and more at the top.  I also had them flying slightly to the left.  I attached my butterflies with a drop of liquid glue in the center so that the wings could be folded up.
I hope you enjoyed my butterfly card.

Lis