Pages

Showing posts with label Scrapbook Pages. Show all posts

Saturday, May 31, 2014

Father's Day Scrapbook Page


Today's project is a 12 x 12 inch scrapbook page for Father's Day. I used the papers and labels from STRONG which is from Authentique (a favorite line of mine). The colors for Strong are browns, terra cottas and denim blues. These colors will go with everything!

I started out by using two of the frames that are in this collection.  What you see on my page are actually two frames.  I thought they looked so good together that I didn't separate them. (I love all things newsprint.)

I added tabs to the word labels (which I cut from one of the papers) with my Tiny Attacher.  I figured staples are manly too, yes?

One thing I like is that if I don't like one side of a tag or label, I can turn it over and use the other side. One side has writing and the other side has a different pattern on it and is blank. That is so cool!

Isn't this cute?


I created my journaling "book" by using the tabs from the collection and adding heart shaped eyelets.


This is the journaling space opened. It gives a little 3-D piece to this page.


Last but not least I wanted to mention the border design I made. I used two different sized square punches. I punched the small punch first. Then I punched the larger square around it to get the square frames below. To make sure that I was positioning the punch correctly I turned it upside down. I laid each square frame down to see how many I would need. Once I got the position the way I wanted it, I glued each one down.


I hope that you enjoyed today's scrapbook page.  Stop by again soon!


Tuesday, February 18, 2014

Old Fashioned Wedding Layout


Old Fashioned Wedding Scrapbook Layout
by Lis Whiting

I love to work in the 6 x 6 (inch) size scrapbook. I can get four pages from one 12 x 12 (inch) sheet.  That means more two-page spreads.  My scrapbook layout today is just that.
I started with Graphic 45 Tropical Travelogue Collection using Tiki Voyager.  When you first look at the paper, it seems too dark for a wedding layout but nothing says "old fashioned" like Graphic 45!
Now here's a tip.  Have you heard of card toppers?  These are little pads of paper ( about 4 x 5 inches) that come in some really pretty designs and edges.  I used two on my scrapbook pages, one on each end.  This is where I will do my journaling.
I added rich brown card stock mats for two pictures and used a third for some embellishments.  If you look, you will see my title here too!
I finished up with some crystal swirls and some gold foil edging.
Now, wasn't that a snap?


Products used:

Saturday, February 15, 2014

Perfect Layers Part 3 of 3: Grandmother - A Scrapbook Page

Hi and welcome to another project using the Perfect Layers rulers!  If you want a set, CLICK ON THE LINK PERFECT LAYERS!  Fran carries them!

I am a bit of a tool junkie BUT the Perfect Layers layering rulers are one tool that I would recommend to everyone.  They are sturdy, easy to use, save time and help me to have beautiful results when I do mats.

I decided to do a scrapbook page today.  I found this cute picture of a child that I wanted to use.  I edged it in gold.  The picture is in black and white so I wanted to have muted colors, if any.


I chose a collection of Authentique paper called Autumn.  I matted it the same width on three sides but matted it much wider on the bottom.  As you can see in the picture below, I used the width of the ruler itself to create my very wide mat.  By doing this I created a perfect place for journaling.
 And here is the result.  Cool, yes?

The Authentique paper I used is really pretty. If you are interested you can find it here: Authentique: Autumn Collection - Autumn Three

 I used a piece of dark brown suede paper and matted the picture on it using my Perfect layers rulers.


Then I took some word stickers and journaled on the extra wide mat at the bottom.


I felt that my finished piece should not have a lot going on as I wanted to really accentuate the picture.  I added a single strip of gold glossy that I embossed with some flowers.  I used a border punch to make the ends fancy.

If you look at the photo, you will see that I created an additional mat using my Perfect Layers rulers, using the same papers.  This mat is only done to three quarters of the photo piece.  I thought it looked quite good.  I added some Bakers Twine with a bow and done!

The 12 x 12 paper that I chose for my base page is from Pebbles.  It has wonderful writing about voyages and Ireland. It makes a great background for a page about families coming to the new world.

If you are interested, it is Pebbles From Me to You Collection and the sheet is called Parcel.  You can find it here:  Pebbles From Me to You Collection: Parcel

Please stop by for more projects and ideas using the Perfect Layers rulers!

Lis

Wednesday, November 13, 2013

Paris Mini Scrapbook Page


Paris Mini Scrapbook Page
by Lis Whiting 

I really like mini scrapbooks and brag books.  I like the smaller size because I can complete the pages a little faster and because I love to use smaller sized pictures (I really do).  For the mini page above, I started with the 6 x 6 daisy sheet from the French Country Collection by Graphic 45. I added some dark green card stock at my mat where my pictures will be.  Don't you love the blue stripe paper?  I thought it was just perfect for this page.  I added a couple of gold photo corners, my ribbon and a Paris brass charm I had. 

The gold photo corners are already adhesive-backed which was nice.  There a several different colors which I like.  The "Carte Postale" is a piece that I cut from one of the other papers from the collection.  I hope you enjoy my page!

Monday, February 4, 2013

Scrapbook Page with Lattice Ribbon

Hi and welcome!

Today I'd like to share a scrapbook page with ribbon accents.

I found this pink lattice ribbon at Costco of all places (you never know what you're going to find).  I really loved the pink color and the lattice design.


Close Up!
I love the butterflies and flowers as embellishments on this ribbon.  For a different look, you could weave leaf ribbon through the lattice (or just attach with hot glue or glue dots) on a card.  Wouldn't ladybugs look cute?


Note: I broke a cardinal scrapbooking rule making this page as the ribbon is not acid free.  I will use only photos after 1980 on this page.


Come back tomorrow for more Ribbonry!

Lis


Wednesday, October 31, 2012

Happy Haunting - A Scrapbook Page!

If you follow my blog you know that I am more of a card person than a scrapbook person...but once in a while I like to do a page.

Today's page is for Halloween!
I used:
  • Graphic 45 Happy Haunting Collection
  • Authentique Enchanted Collection


Close Up!

Don't you just love this cute little girl?
 I used a Martha Stewart Halloween fence punch to make the blue glitter fence.  I used blue gitter brads on the title. 

I really love this witch!  I die cut it from a Tim Holtz die.

The moon and clock were cut out from some of the happy haunting paper.


I hope you enjoyed my scrapbook page! 

Have a spooky Halloween!

Lis

Thursday, December 1, 2011

Scrapbook Page - Marching Band at Disneyland

My nephew is in a marching band that got invited by Disney to play.  I created a scrapbook page from the pictures that were sent to me.  I don't do many scrapbook pages.  I have been to all the classes and even completed SDU.  I do like to create scrapbook cards which are a lot of fun to make.  If you would like to see more scrapbooking, let me know in your comments.

Hope you like my page!

Lis

Saturday, July 9, 2011

Scrapbook Page FRIENDS with Martha Stewart Punch

Hi everyone and welcome to the last item for the Martha Stewart Scroll Heart Punch.

Today is a scrapbook page. I don't really do much scrapbooking. I like cards best.  I hope you find this page ok.  I just didn't have a great creative day I guess.  Hope you get some good ideas from it. (The colors for this page are pink which is hard to see.  I will retake the pictures and post again later.  Sometimes I get this darker orangy color contrast and it drives me batty!)


Close Up!


Stop by next weekend for more inspiration!
Lis

Friday, July 8, 2011

Scrapbook Page with Martha Stewart Scroll Heart Deep Edger Punch!

Hi everyone and welcome to the weekend!  This weekend I am going to share some scrapbook pages with you.  Enjoy!

I used the Martha Stewart punch as a border for my picture.  I was trying to get a vintage red, white and blue feel to this. I'm not sure I did though! LOL!

I stamped a chandelier image (hero arts) randomly on the page (Basic Grey paper).  Did you recognize the suitcase? It's one of the Tim Holtz die designs from Sizzix.

I tore some DCWV papers and edged them in Faded Jeans  dye ink (Ranger) - as I did the suitcase.


Close Up!
Don't you love these alphabet pieces?  They are a dimensional yellow plastic and about the same size as typewriter keys (for those of you old enough to remember them like me!)


Here is the suitcase again. I used water droplets to make the case look more worn.


Thanks and come again tomorrow for more scrapbook pages!

Lis

Sunday, March 20, 2011

What to do with scrapbook paper with large images

Hi everyone!

Have you ever purchased a beautiful piece of scrapbook paper because it had a beautiful scene or image on it?  Then you get it home and wonder how you can possibly incorporate it into a card because the image is so big?  Me, too!

Solution:  Cut out the image and either make it a central focus (example below) or use it in a collaged card.


The central image on the scrapbook paper that I bought was this pretty girl looking at a huge cupcake.  The right side was this really pretty glitter plaid. 

First, I used the plaid as a background.  I used a corner punch to make fancy corners. I added some music tissue tape (Tim Holtz) and some school desk tape (You can find this at your local school teacher supply store.  I highly recommend visiting this store.  They have all kinds of stuff to use in collage.  Would you like a pack of library cards like they have in the books at the library?  They have them here!  Tapes, tags, papers, magnets,  you just have to go!)

I cut the girl and frosting out.  I attached this to the mat with foam tape. Then I cut the cupcake part out and slid it under the frosting at the bottom.  It really gives this more of a 3-d look than if I had cut the whole piece out together.

I added a gold satin bow and ribbon and done!


How do you incorporate large images into your cards?

Friday, March 4, 2011

A Scrapbook Page! Lazy Day Ike

You may know that I have a kitty named Ike.  I took pictures one day of him (almost) sleeping in his favorite sunny spot.


I printed his picture a few times and then cut out strips with his eyes.  I used these as part of the border.  The strips also hid the saparations with the embossed border pieces (I could only emboss 5 inches at a time so I had to cut three strips to have one 12 inch long border strip.)


This is a trick I learned.  Take a ruler (or in this case I use a clear package) and put your letters on it.  Now you can move it around until you get the title where you want it.  When you are happy with the positon, press the letters down.  Be careful when taking away your ruler though or you may pull a letter out of position.

I hope you enjoyed this. Take care!~

Wednesday, February 23, 2011

Scrapbook Page with Scroll Heart Frame

Hi everyone!  I hope that you are enjoying this week's creativity with Martha Stewart's Scroll Heart Punch.  Today I wanted to do a scrapbook page.  I chose Graphic 45's Renaissance Faire papers.  I thought they would match the elegant scrollwork of the punch.


First thing I asked myself was "how do I make a corner punch out of a border punch?"  Many of the punches that Martha Stewart makes do have corner punches that go along with the borders (they are called Punch Around the Page punches.)  The Scroll Heart Punch doesn't have any of that so I had to improvise.


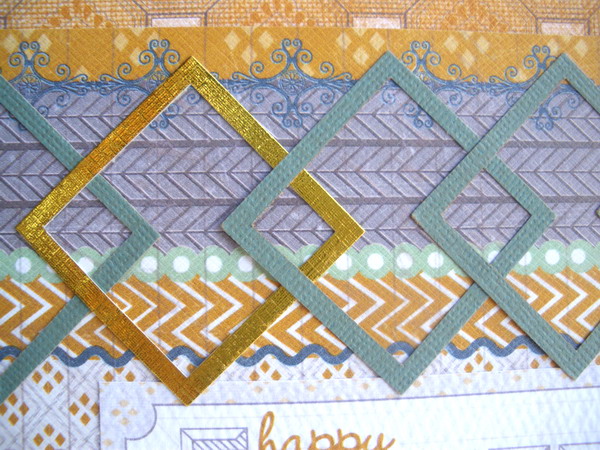
First, here is the result of what I did.


Here is how I did it:
 I flipped the punch over so I could see the actual punching surface.  Any of you who use punches routinely is familiar with this.  I don't think many people have used this technique on the MS punches because they are so well done that you really don't have to.  For this result, you do though.

I put the corner of a 12 x 12 paper in the punch, lined it up and punched once.


This is a scrap piece of paper but I wanted to show you what it looks like.


Next I put the long side of the paper in the punch (looking at it from the back side again).  I lined it up using the punched corner as a reference. (How I lined it up and how you may line it up are purely personal preference.)  You can see in the picture below that I had enough paper in the punch to get everything including the top of the heart punched out.  BUT you can also see that there is a small space between the bottom of the paper and the bottom of the punch.


After I punched this once on each side, it looked like this.

I continued to punch a border but I did NOT use the guides on the front.  Remember that my border is about 1/8" off from the guide.   I continued to punch from the back side, lining up each punch as I went along. I punched a couple of times until I got to where I thought my frame would be big enough. (I didn't measure.)


OK.  Here is the trick.  As you can imagine, punching the first corner was easy.  Punching any of the other corners was impossible because I had no reference and a big ol' piece of 12 x 12 with some punched edges...LOL.  So, I improvised.  I cut a piece of cardstock and punched a corner in it with the same pattern I was using for my frame.


I matched it up with the corner that I punched in my 12x12.  I noticed that the paper covered up the heart.


So, I looked at the border where I wanted to stop and make a corner.  There was the heart.


I took my scrap piece and placed it so that the heart was covered and the corner on the piece of paper was in about the right position for a corner.


I cut my 12x12 right at the edge of the corner.


Now I have a corner, AND a reference, so I can punch my corner.

I used this technique with the other corners and as you can see, it worked really well.


More details:
After I finished punching the frame, I embossed it using copper super fine EP.  I used a writing stamp and versa mark and embosssed the writing design on it.  I added a center paper 4x4 and edged that in copper EP as well.  The four corners are actually pieces I cut from the cover of the paper stack from Graphic 45 (waste not, want not).  I back it all on a mocha cardstock.

I did a little paper tearing and added Aged Mahogany distress ink to the edges. I finished it off with some pearls.  I didn't put a picture or a title on this page.  The picture would go in the middle on top of the green cardstock.  The title can be place either at the top or bottom.  I left room for other embellishments and journaling also.


I hope you enjoyed looking at this project and how to solve the corner punch problem.  Take Care!