Pages

Showing posts with label Books and Journals. Show all posts

Sunday, January 6, 2013

NEWS: A Little Journal using Authentique Renew Collection

Don't you just love little journals that you can put pictures and little memorabilia in? (Yes, I own a smashbook!)

Today I'm sharing a little journal that I made for the new Year. It's called NEWS.   I wanted something that I could have to fill up each month and send off to my dad so that he can keep up with all the news about me.  So often things happen and time flies so quickly that I never make mention of them . This way I;ll be sure to have a little news for my dad each month. He will enjoy leafing through the journal and discovering what I've been up to!


Close Up!

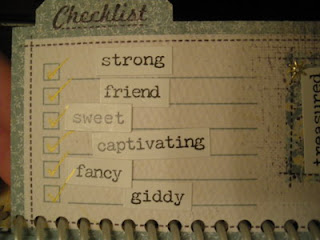
I love the index folders that Authentique gives you.  It's a nice place to scrap some pics or write a thought.


These are also cute - they are like recipe cards with tabs, double sided.


There is one sheet of nothing but numbers.  The numbers are darling - giving variations of each from the number to spelled out to stylized, like "one" below.


This is one of the cameos that Frantic Stamper carries.  Just beautiful!


There is a sheet of sayings and the "four" below is from the number sheet.


I hope that you enjoyed my Authentique cards, home decor and journal.  Have a great day!


Lis

Saturday, April 9, 2011

Art is Joy and Joy is Art Book

You all know how much I love making books!  Well today I am going to share one of my favorite ones with you.  I call it my Art is Joy Book.

I started out by by die cutting the scalloped squares.  To do this I first covered chipboard with Basic Grey papers.  This way when I cut them I wouldn't have to trim them afterwards. It gives a clean and finished look.  You may not have dies to cut these but you may want to visit your local scrapbook store. They usually have dies like this that you can use.  The dimensions of my little book are 4 inches x 4 inches.


 After I cut out all the pages, I lined them up and put them together so that I would be working on the two facing pages at the same time.  This way I could coordinate the designs across both pages.  I love making shaker boxes.  The two on the left have seashells in them.

I like to add different media to my little books. On the pages below I added a pair of angel wings that I made from melted UTEE and a mould.


I used the same rubber stamp on both pages but I used different colored inks.  I really love this page because of the cut outs I added. Again these were just designs from a larger piece of scrapbook paper. I used design scissors to cut them out. I love the stamped edge one. I covered them in glue and added clear glass beads.  It's hard to see in this picture but they look like sugared fruit does.


On this page I made a buddha mould out of paper.  I added clear plastic squares on the right and a purple tassel.


On the back I have a ribbon with a brass ribbon slide.  I had a postcard and cut out the image and added the letters for ART to it.  I foiled the letters.

I punched holes in the left side with a Zutter binding machine and bound my book pages with o-wire.

Thursday, March 31, 2011

Visions and Dreams Book

I love to make little journals and books. I think it's exciting to turn each page and see what is on the next page.  I like to add little doors to open, little cubbys to put stuff in, little drawers to pull out.

The little book I made for today does not have all the extras that you might find in one of my bigger books, but it has some very pretty pages that I decorated with Alice in Wonderland papers from Graphic 45.

I started with a pre-made book that had a scalloped design. 


I glued two inner pages together for strength and ended up with 4-5 total pages to decorate.  To cut the papers to fit onto the pages, I made a template from one of the inner pages and used it to trace the page shape onto the papers that I was going to use.

Here you can see that I used a lot of ribbons for the spine of the book, weaving them in and out of the wires.


This is the front of my book.

 And this is the back of my book.  I covered the back with Tim Holtz tissue tape.  That's all I used.  Looks good, doesn't it?

Here is another look at the front and back together.


Here are the pages to my little book.  I did leave the centers undecorated.  I may put ribbons on the inside rungs also.  My books tend to be a work in progress.


I used miniature classic art stickers and framed them.

 And I decorated with punched out Fleur De Li's in blue glitter paper.  I edged all the pages and covers with a gold paint pen for a finished look.

I added a french page and even added a white feather!  The purple shield with the Eiffel tower and "PARIS" is actually a paper clay mould I did.

I used little acrylic gems here.

I left the last pages blank.  I just liked the way they were.


Here are a couple of close ups of some of the details.


I hope that you enjoyed today's little book of mine!


Sunday, February 20, 2011

Scroll Heart Tabbed Tag Book (Buch met scroll heart punch)

Hello and Happy Sunday to you all!  I hope that you find today a wonderful day.

I was playing around with the scroll heart punch and thought "wouldn't this make a pretty design on the end of a tag for a book?"  I went through a few trials before I ended up with what you will see below.  I love taking pieces of a design and using them in different ways. Because the scroll heart design is larger, it's easier to cut away pieces of the design to get a new look.

The tabbed hearts are actually from the punch design. 
  1. I used thinner patterned paper for my tags.  I cut the tags out from a Tim Holtz Tag die from Sizzix first.  I used the heart in the center of the design as my center point.
  2. Then I punched the ends of the tags.
  3. I punched once for each tag:  once on the left for the first tag, once in the middle for the second tag and once on the right for the third tag.
  4. I cut away the parts of the design I didn't want which left the heart design.


 Here are pictures of the Tag Book Cover and pages.


Details, Details...closeups of some of the details of my Tag Book.


 The punched border makes a nice accent here.  I glued the border on each tag so that when the page is opened, it creates some unity between the two pages, left and right.


This little tag book makes a great Brag Book for the scrapbookers.  You don't have to stop at three tags.  You can add more, just alternate the tabbed hearts!