Pages

Saturday, February 19, 2011

Scroll Heart Collage Card(Kaarten met scroll heart punch)

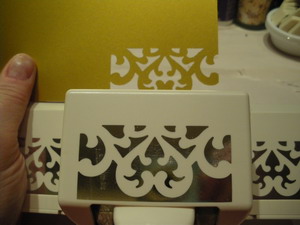
I promised one more card for the first installment of how I am going to use the Martha Stewart Scroll Heart punch.  Here it is! 

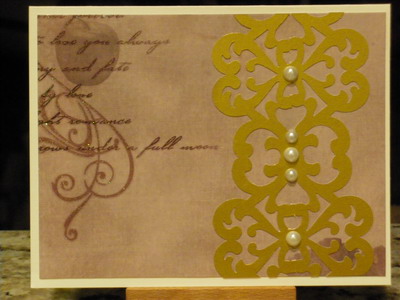
I took portions of the mirrored border design and cut them out, placing them on my card.  You will notice that on the left side it is a portion of a strip, one of my favorite things to do.

Its interesting how the gold foil from the heart (on the hanger) picks up the colors of the ribbons.


I cut out the heart below from the border design and added it as a separate piece to my design.  These would also make great:
  • photo corners
  • ribbon slides
  • tile designs


So, I used a punch to make a mirrored border and used it in three different ways on a card:
  1. As the mirrored border
  2. As a shadow and border to create a 3d effect
  3. As pieces to complement a card.
I wonder what we'll do tomorrow??

Thanks for stopping by.  Please leave a comment with what you would like to see!

One Punch, Many Looks...A Week of Experimentation

Hi everyone and Happy Friday to you all!

This week I just got too excited to wait until Sunday to post!  I have selected a punch and will be making cards, tags (and who knows what else) using the one punch.

This is not a new idea but I am always intrigued by tools.  I ask myself "what else can I use this for"? Punches have SO MANY design opportunities.  Its very exciting to discover a new way to use a punch.  (Actually, a friend once told me that her "house weights" would be helpful in a tornado...LOL!)  But I digress...

So, without further ado I would like to introduce you to the punch I have chosen for this week.

Scroll Heart

This is one of Martha Stewart's new designs in her Deep Edger punches.

So, start with a piece of gold glossy (or other paper) and punch the design in one side. (the pattern on each side or "wing" of the punch guides you so that you make a perfect border each time.


Now measure the width of the design.  This one is 1 1/4 inches wide.  That means I need at least 1 1/4 more inches of gold glossy because.....I'm going to punch the same design on the other side creating a mirrored effect.

 So, I cut my cardstock to a total width of 2 1/2 inches.


I turned my paper over to the BACK SIDE.  I lined up the pattern and began to punch again.


Very nice.  As you can see, my punched design is not exactly perfect.  But handmade is rarely perfect.  You will also note the thin lines of paper running through the middle of the design.

I used an x-acto blade and cut them off.

Here are two cards I made with this design.

The first card has a classic feel.  I simply added the design to the right of the card and added some pearls. (Paper is from DCWV.)


The second card is a bit different.  I punched the design in the blue background.  I overlaid the gold design onto the blue and overlapped it.  It created a nice 3-d effect.  I added ribbon and jewels.


(I am working on a 3rd card for this design, As soon as I finish I will post.  Its a collage card.)

Tuesday, February 15, 2011

Last Valentine's Day Card (I swear!)

I have one more Valentine's Day card to share with you.  This card is made with copper sheet run through cuttlebug (center is cut out).  The paper is from DCWV - I believe its called Vintage.  I cut out a piece with the rose, added glitter to it and then put it behind the foil.  It looks really nice in person.  The picture didn't really capture the glittered rose as I had hoped. However, you can get an idea from this picture below.  You will notice that the glitter does make the rose more 3-d. (The rose is not embossed.)


I am working on doing some videos to share with you on my blog.  I want to do some short technique videos that I think you will enjoy.  So...coming soon!

Sunday, February 13, 2011

Family Valentine Cards

Hi everyone!
I thought I would share pics of the valentine cards I made for my sisters.  I'm a bit late this year but - hey! they will get to them by the end of the week.  Hope you enjoy these.  If you are wondering what products I used, please add a comment.

First up are a couple of cards using Anna Griffin's paper line.  I really love her papers because of the great victorian feel they have. Did you know that she collects vintage wallpaper and uses the patterns on some of her papers?  Isn't that great! 

The lock and key came from an Accucut die that was released at the 2010 CHA I believe.  Its a great die and has a lock and two keys on it.  I added foil to the chipboard and then die cut the lock and key.  The little gold heart on the second card is the inside of the key from the die cut.


 Boy do I love bling!  I took some of the prima Say It in Crystals and covered the card (after I added the bow and the punch design).  I simply trimmed off anything that was outside the card margin.  I can use those extra bits to accent other cards in the future.  The punch is a new one that EK Success has in a plaid design border.