Pages

Saturday, March 1, 2014

Sara Bernhardt


Sarah Bernhardt - a Coloring Project
by Lis Whiting

I saw this Frantic Stamper stamp and thought it would be a beautiful front to a card.  I stamped the image wint Staz on black onto ivory card stock. 

I used chalks to color most of the image.  I colored the stars and did the lettering with Distress Markers.  I used gold glitter Dazzles for the border and matted the entire thing onto dark brown card stock.  My card base is a dark pink. (I have to say that I briefly questioned my sanity when I chose this card base...I wasn't sure it would work out but it works beautifully with the pink chalk accents on the image's cheeks and the flowers.)


Products used:

"Art is never finished..."


"Art is never finished..." - a Coloring Project
by Lis Whiting

I've been wanting to use some transparency with my work and I thought this would be a good opportunity.  I like to work with transparency (the kind you get at Staples - nothing special).  It's a challenge working with it and getting it to combine with a card.
I stamped my images on my transparency (4 x 5 1/4 inches) in Staz-On black on the front.  It's important to use this because regular inks won't dry on this non-porous surface. 


I set the stamped piece aside and worked on the "coloring" of my background.  I am currently using Paper Artsy Fresco acrylic paints. 


I used a craft mat for this.  I chose three colors and, starting with my first color, I squeezed out a little bit onto my mat.  I used a flat paint brush and painted the top portion of my white card stock with my color.  I did the same with the next two colors, working my way down the card stock and blending the edges as I went.  I didn't want a "perfect" look so I was not too careful with my painting, allowing some white from the card stock to show through.  I edges my background in Vintage Photo.
I attached the transparency to my painted background with adhesive sheet.  Since I was not attaching my transparency with brads or staples, I needed an all over adhesive that wouldn't show.
I added a ribbon to the front of my card and used a lavender card base.
Thanks for stopping by!


Products used:

Grapes


Grapes - a Coloring Project
by Lis Whiting

I had this beautiful grapes and leaves Frantic Stamper stamp and have been holding onto it for a while. I finally decided to use it but wasn't sure how I was going to fit it on a card.  I started by stamping it with Staz-On black on plain, smooth white card stock.  I stamped another image just in case I needed it (turned out I did).
I just got the new Ranger Distress Marker colors and I've been dying to use them.  I started by coloring the leaves with Mowed Lawn and the grapes with, what else, Seedless Preserves.  I colored the centers of the leaves darker and then spritzed some water onto a paper towel and dabbed off some of the color. This is how I got the shades on my leaves.  I also used Picket Fence on the grapes (just a few lines on the center ones).  I also dabbed off some color on these as well.  I cut out the first image that was completely colored and set it aside.
I colored one leaf and most of the grapes on my second image, using the same technique.  I cut out the leaf and cut out the grapes in two sections.  I layered the leaf and the grapes onto my other image with foam tape to create a paper tole-like/3D image. I edged my leaves and the stem with gold.

To create my card, I used some pink suede paper and die cut the On the Edge Doily pattern (Tim Holtz).  I also punched out a pattern with EK Success punch.  Lastly, I used some gold foil paper to add to my card.  The layers are (from top to bottom) patterned paper, suede paper, gold foil. I attached the grapes and leaves with glue stick.


Products used:

Gold Doily on Blue


Gold Doily on Blue (A Color Challenge)
by Lis Whiting

I really love challenges!  It makes me stretch my creative "muscle" so to speak (and it's so much fun seeing what everyone has come up with - I would love to see yours! So don't forget to participate!)
This is a color challenge.  I chose some really pretty blue patterned papers and backed them with a dark solid blue.  I chose Authentique because they have collections in color choices. For yellow, I used a yellow ribbon and some gold (as a different shade of yellow).  I embossed the gold pieces - I was going for a similar design as the background blue paper. Can you tell? Isn't this tiny doily die just too cute!  And I was amazed at the intricacy of it too!  Easy to make die cuts.  I finished with a cameo and a single dark blue crystal. 


Products used:

Lavender Lace Card with Suede Paper

Hi everyone!

I am so excited about my new laptop!  It's taking some getting used to, especially the typing.  I've not used a laptop very much.  My old computer just is old old old and SLOOOWWW....you know what I mean! So, this will be better I think.  How did you like my very first videos?  I was overjoyed with them - even though they are just beginner!  I hope to start doing videos where I give a card picture, the list of materials and you can watch the video and follow along and make the card.  what do you think? (I am getting better with my camera work and feedback from all of you! So a big THANK YOU! for that!)

I made a card for my mother in law (Ive been divorced for over 14 years now but she was always so nice and I consider her a good friend.  She is the most wonderful person!  So, I made her a card.  I am not the greatest remembering birthdays and anniversaries.  I always seem to be late with holidays too.  I'm trying very hard to change this but its difficult with my lifestyle being so busy.


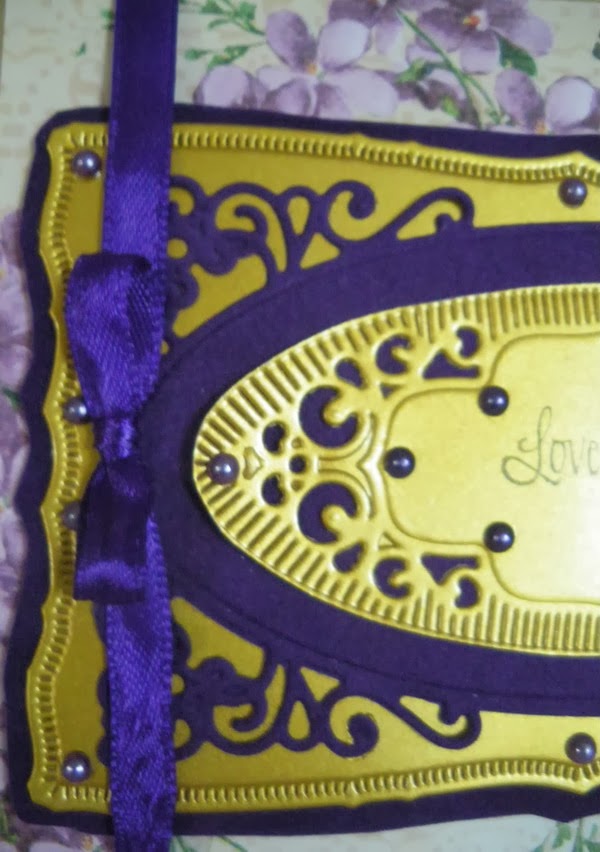
 I chose a very feminine lilac flower design for my base and edged that in gold. This was mounted on a white card base (A2).  I use the fancy rectangles from Spellbinders to cut gold glossy rectangle and purple suede layers.  I used a purple ribbon and two shades of purple pearls to embellish. I also added a lavender heart shaped pearl.


You can see below that I mounted the layers onto my card using mounting tape to give it some dimension.


Thank you for stopping by.  Come back again as I develop my blog with videos!

Lis

Tuesday, February 25, 2014

Cat Willow Card


Cat Willow Card
by Lis Whiting

I used two stamped and colored cat willows for my card. Both were matted to dark brown card stock. To accommodate both stamped images I used a 5 1/2 x 5 1/2 inch sized card. I used some very lovely Authentique papers (collections listed below).  I punched a border for the bottom of my card and decorated it with red crystals. 

I punched a leafy vine out of green foiled cardstock and used that as decoration at the top of my card.  I added a butterfly as a final touch.  This tamp would look good cropped to a square and tiled on a card also!


Sunday, February 23, 2014

Stacked Hearts

Hi everyone!  My card today is a quick and simple use of specialty papers.  Specialty papers (suede paper, holographic papers, florentine, glossies, foils, yuzen washi, handmades, the list goes on and on) don't get nearly the attention that they deserve. Being a paper fanatic, I am fascinated by paper, how it's made, the variety in the marketplace today, and oh the colors!

I think we don't know what to do with specialty papers sometimes. So, I put together a little card - simple and easy and I used specialty papers!

Most cards I make are sized A2. I don't know why, I just like that size.  I read once that poems and short stories challenge the writer because he/she had to work with fewer words.  Maybe I like A2 because it challenges me with smaller space to make that big statement.

I started with a plain red card for my card base.  I used a Frantic Stamper die of all over hearts and die cut a sheet of pain white card and glued this to my red card front to form the base of my card. I wanted a plain background to show off my papers.


I have some Punch Bunch punches in scalloped hearts of different sizes and used my specialty papers here.  From the top: blue holographic , white suede, purple holographic, mottled gold foil, red suede, and the bow is made from copper crochet ribbon.

I attached each heart using foam tape. I attached the bow with glue dots.  I also added some blingy swirls.

Try some specialty paper and see what you can come up with!

Lis