Pages

Saturday, July 2, 2011

Happy Birthday! with Martha Stewart's Scroll Heart Deep Edger Punch

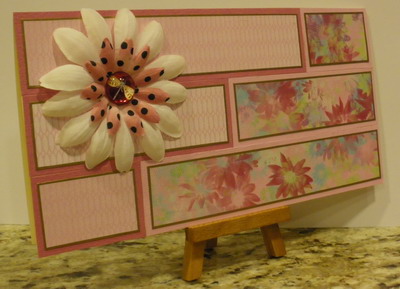
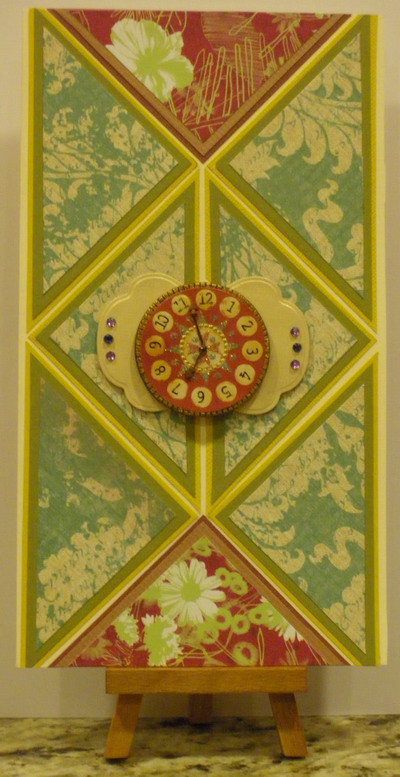
Hi everyone and welcome to today's card. 


Today's card is a simple scroll heart border punched out of Core'dinations card stock and sanded.  This gives it a nice worn look.  I added some crochet ribbon at the bottom to add more vintage feel to this card. (Be careful of crochet because it can unravel when its cut.  Clear nail polish or glue dots will help with this.)


Close Up!

My favorite part of this card is the seashell. This is one of Fiskars limited edition punches with sea motifs.  I added pearls and a metal flower.  I colored the metal flower with Smooch (not the spray although you probably could spray Smooch onto a craft mat and use a paint brush.)

You can really see the nice distressed edge in this picture.

The Happy Birthday label is from an Anna Griffin card kit that I purchased a while ago.  The reason I point this out is that although we don't have a hot foil stamp we can cut up white (or ivory) card stock and gold emboss messages.  We can keep them handy until we need them.


Thanks and stop by tomorrow for another card!

Lis

Summer Bathing Beauties #2 with Martha Stewart's Scroll Heart Deep Edger Punch

Hi everyone!

Here is my second bathing beauty card for you!

I thought this card turned out very pretty.  I ruffled the organza ribbon (this time in a periwinkle) and tacked it down with glue dots.  Organza is tough to glue down because I can still feel the glue dot through the organza so I use the ruffles to help with that.

I had this really pretty light blue background paper with brown scrolling on it -it reminded me of water - but I felt that it wasn't enough so I cut some strips of different papers and glued them on top.

You may notice that I edged only the right side and bottom of the mat in gold.  I used a modified design of the punch to the left of the picture.


I found these pretty aqua blue gems at Michaels and thought they would be perfect for a summer themed card.


Close up!

I hope you enjoyed this card. Stay tuned for more scroll heart punch designs!

Lis

Friday, July 1, 2011

Summer Bathing Beauties #1 with Martha Stewart's Scroll Heart Deep Edger Punch

Hi everyone!  Are you ready for the first installment of cards?

My first card uses a reddish punched border at the top and bottom of my card. The paper is from 7 Gypsies.  The background paper on my card is from Basic Grey (Its actually one sheet.  Did you notice how the little squares go from  blue/red to brown/red?)  The picture is from a sheet of Graphic 45 paper I believe.


The card is finished off with an olive green organza bow.

Close up!

I really like the tiny little pearls at the corners of the bathing beauty picture.


I really like organza ribbon.  Its light and airy and has a little bit of sparkle to it.

 Thanks for stopping by! Come back for more Martha!

Lis

Techniques with Martha Stewart's Scroll Heart Deep Edger Punch

Hi everyone and welcome to another Martha Stewart Scroll Heart Deep Edger Punch weekend!

First I want to talk about some techniques that I use and then some cards!

Choosing the Paper:
I have found that I can really get some pretty looking punches simply by choosing the right paper.
1. The most obvious lesson that we all already know is that the more intricate the punch, the harder it is to punch thicker paper.  Forget about coated papers - it's isn't going to happen.
As for this punch, I find that I can punch regular card stock and even the thicker card stock.  Basic Grey is an example of some heavier card stock that punches very nicely.

2. Speaking of Basic Grey...you know that their papers (and many other company's also) tend to be designed to have a faded edge, or scroll designs.  I have found that by using that as part of the punch, I come up with some beautiful punched borders.
This example is actually 7 Gypsies papers.  The colored or distressed edges work out quite well and give my punch that extra something.  I didn't cut the paper, I just punched my border from the edge.  Keep your eye open for such opportunities.

Using the Punch Design
Punches are a BIG investment.  I read somewhere that punches have gone up in price because the metal used to fabricate them has gone up.  SO....if you are going to invest in a punch, ask yourself what else you can use them for.  What other designs do you see in the design?

The scroll heart punch has a number of possibilities.  Here are some.

In each of these pictures, the top punched design remains the same (it is the design without any alteration).  The BOTTOM design is from the same original punched design BUT I have cut some of the design apart or out to create a new design.

You should be able to compare the top and bottom to see what I have cut out to change the design.


 I really liked this one.


 The two blue strips below are the result of me using a ruler and xacto blade and cutting across the top of the design.  I almost didn't include these but there really are some possibilities for them.  They remind me a little of art deco.  I think that if I placed two strips back to back, I could get a nice border.


Here are the four variations along with the original design at the top.  This punch has  so many possibilities.  And don't forget that you can enhance the designs by putting two strips back to back.


Making each border punched the same as the next.
The Martha Stewart designers have done a tremendous job on their punch designs.  They have wings that fold up for easy storage AND THEY HAVE LINES. The lines that I speak of are on the wings.  You can start your punched border at the same place every time by lining up your paper on a line.  You can also use the design itself to line up your paper as I have below.

You will notice that I started my paper lined up in the middle of the heart.  I punched the border (easy to punch from both sides).  I put in my next piece of paper and lined up my paper edge in the same place and punched my next border.


The result is that I have the exact same border punch on every sheet of paper.


Hope you enjoyed this!  Now for the cards! Yippee!

Lis

Thursday, June 30, 2011

Geometric Designs - Circular Logic Card

Hi everyone and welcome to the 4th and final installment of my Geometric Designs for Cards!

Today I want to share something a little less "exact"...circles!  Yes, of course circles can be placed on a card in a very exact way but I decided with this card I would do a more random pattern.


I outlined the base card (ivory card stock) with some 7 Gypsies paper tape in Lille. I chose the canceled stamps - they are so colorful! Then I used some of the new Basic Grey paper in Oxford as the center.  I love this beautiful blue.  Then I added circles...different sizes, colors and even a couple with scallops.  I admit that I cheated a little. When I got the Basic Grey 12x12 paper pack, they had a sticker sheet that included many circles. These are the ones I used.  However, you can also use punches or dies to cut out your circles.  I do think that circle frames work out much better than solid circles.


Close Up!


Thanks for stopping by!

Lis

Martha Stewart's Scroll Heart Deep Edger Punch - Another Weekend with Martha!

Hi everyone!

I continue to get hits on the pages I did with the Martha Stewart Scroll Heart Deep Edger Punch. 


So many of you like that punch and I dont blame you! It's beautiful!  So, I have decided to create some more beautiful designs using this punch this coming weekend.  (In case you missed the original projects, look in my blog starting February 19th.)


Stay tuned!

Lis

Tuesday, June 28, 2011

Geometric Designs - Rectangles and a Summer Flower

Hi everyone and Happy Tuesday!

Today' I want to share with you another card with a pretty geometrical design. 

I love the way that geometric designs are so neat and balanced.  I used to do a lot of geometric art when I was in high school and I still love it today.

I started out with a single color palette of pinks and reds (mostly).  I chose two patterned papers and cut strips 6 1/2", 4 1/4" and 2".  I outlined them in gold then matted them.


I lined up three strips on one end and then was able to easily line up the other strips using the first strips as a guide.  For this type of pattern, it is important to be exact as any difference will cause the strips to not line up exactly. 

I added some petaloo flowers to accent my card and I was done! Very pretty!


Close Up!

I really love the glass embellishment with the dragonfly image inside.  It's just perfect for this summery card.

Here you can see the layers BUT did you know I only used two?  The faux layer is actually where i edged the patterned paper in gold. 


Hope you enjoyed today's card!

Lis

Monday, June 27, 2011

Geometric Designs - Triangles and Time

Hi everyone!

Hope that you are all doing well this last week in June.  I know that I normally post every Friday through Sunday but this past weekend was a busy one and I worked.  So, I am posting this week!

I love geometric designs.  Today's card is done with triangles! 

I really like the design.  I started out with 2 1/2" squares which I then cut from corner to corner to make my traingles. Then I glued each triangle to my next cardstock and then cut the mat.  Then I glued this to another cardstock and cut another mat. I arranged the triangles on my card.  I cut my card edge down to size once the triangles were in place.


Close Up!

The clock sticker that I used is really 3-dimentional!  It is fromt he Joliees Sticker Line called Parcel.  This line is full of wonderful old-timey, victorian-feel stickers of all sorts, even crocheted flowers!  They are really beautiful to add to any card.

I added a label (Spellbinders) and a few gems (and the clock) to my card...although the design can stand on it's own.


 I matted each triangle twice with two different sized edges.  How did I manage to do that EASILY?  I'll tell you.  There is a product out there called Perfect Layers. It is a set of clear plast "rulers".  The rules have an edge to them (there are four different ones to each ruler).  You but the ruler against the first paper and cut and you have a perfect mat each time.  I LOVE this product!  All you need is an x-acto blade (or one of those round blades that you use to cut fabric) to cut the mats.  No measuring!

Here is a blogspot with a short tutorial: Click HERE. (This is from 2007 but is a good pic by pic.  She talks about 2 rulers which is from the old set.  There are now three rulers and another corner thingie.)

You can find Perfect Layers sold at HSN. Click HERE to see that page. (They also have a video tutorial that you can see.)  If HSN is sold out you can try ebay.

I highly recommend this product. You will love it if you get it!


Hope you enjoyed today's geometric card!  Stop by tomorrow to see another one!

Lis

Sunday, June 26, 2011

Compostion for Design - Grid: Music 9 Times

Hi everyone,

I wanted to share my last composition from my class. It is called a grid design, and I am sure that you recognize it.  This is a popular and easy composition design to use.  Enjoy!

Lis


Close Up!