Pages

Showing posts with label Jewelry. Show all posts

Saturday, October 4, 2014

Cowboy Bracelet


YEEHAA! (Sorry, I couldn't help myself!)

Today's project is a cute bracelet with icons that represent our cowboys - boots, hats and horse shoes!

These cute decorations were made using shrink plastic, Spectrum noir alcohol ink pens and Frantic Stamper Precision Dies (Here is the set that I used if you are interested: Cowboy Accessories - three die set  FRA-Die-09123) .

These dies were a little trickier to use with shrink plastic.  I found that I needed to hold my heat gun over the individual die cut 3-4 inches and heat the entire piece at once in order for it to turn out really well.  Although I did use the alcohol ink pens before I heated my shrink plastic, I also usd them for touch ups afterwards.  Also, since this is alcohol ink, I didn't bother to sand the shrink plastic before I colored it.

Once I finished the shrinking and coloring, I took some gold tone jump rings and used them to attach my charms to my bracelet.  Since the die cuts already had holes in them I didn't need to punch any beforehand.

I really like the way that the boots turned out.  The colors and the look of long wear really fit these boots!


I wanted something colorful on my bracelet o I chose to make the horseshoe blue.  The horseshoe didn't really have any holes bigg enough to string a jump ring through so I wound some gold tone wire around the horseshoe and created a loop to attach to my bracelet.

I hope you enjoyed my cowboy bracelet. Now go make one of your own!

Thanks for stopping by!
Lis


Thursday, May 8, 2014

Wine Country Bracelet


I've had the Frantic Stamper Bottle die for a while and have been thinking of creating a piece of jewelry.  I like shrink plastic and have been experimenting lately with it again.  Each new die I use with shrink plastic does have it's own challenge.  This time I have learned that not all die cuts are created equal and each one has to be heated carefully if I want the finished product to come out right.
 
The bottle was easy to cut out of shrink plastic and heat shrink it.  To start I sanded the piece of shrink plastic so that it would hold color from chalk.  I then colored four sections, each representing a different kind of wine.  Then I cut out each bottle.  When I was heating each piece separately, I held my heat gun about 3-4 inches above my die cut so that the heat would go to the piece evenly.  I held my piece with some scissors (I really need to get a better tool for this!) As each piece shrinks, the color darkens.

I added some rub ons to decorate my bottles. Then I just added them to a chain for a bracelet.  I coiled some gold tone wire around the neck which does look pretty.
Notice that I used white rub ons for the purple bottle. I thought the color was too dark for black rub ons. I think this worked out perfectly.

I hope that you try this out with some of your dies!


Friday, May 6, 2011

Mini-Bottlecap Bracelet

Hi everyone and Happy Friday!


I was sitting at my very messy craft table and decided to make something other than a card for my project. And since I like jewelry as much as I do card making, I decided to make a bracelet with some of the new bottle cap supplies at Frantic Stamper!

I love the new mini bottle caps and as soon as Fran had them on her website, I ordered a package. These mini bottle caps are so cute! I just knew I had to make a charm bracelet out of them!

I went to the local craft store and picked up a silver plated chain, some jump rings and a lobster claw clasp. I ran home and started to work on my design. I measured the chain to 7 ½” and cut it. (I didn’t realize how strong this chain was and the ring I cut kind of ricocheted across my craft room!) I attached the lobster claw clasp with a jump ring.

To prepare my caps, I drilled a small hole in the side of each one.

Then came the fun part! I looked in my paper stash for some fun pictures because I wanted to make a Mother’s Day bracelet with children’s pictures. You are not going to believe where I found some. I had purchased some Webster’s Flash Cards a while back. The package had a preview card with miniature pictures of the different flash cards on it; THAT is what I used. I took a ½” punch and punched out the images that I wanted (the first one went zinging across my craft room…) and used glue dots to add them to the inside of the caps. Darice makes clear epoxy domes to match the size of the mini caps; I added these on top of my images.

Now, if you know me, you KNOW I have to have bling! I added a red acrylic gem I had. I also found a pretty letter that I liked and made one charm an initial charm.

I used jump rings through the drilled holes to attach the cap charms to the bracelet.

I put the bracelet on and have been wearing it since! It has such a nice tinkling sound when I move. I love the pictures, too; they are old timey, colorful and fun to look at. I think I may have to make matching earrings and a necklace!

I left my caps plain on the backs but you may want to:
      Color them with alcohol inks
      Stamp them with designs using StazOn inks

As for the insides of the caps, you may want to try melting some UTEE to fill the caps instead of putting pictures in them.

I hope that you enjoyed this project. I sure did!

Monday, March 21, 2011

Tick Tock Domino Clock Pin!

Hi everyone, I hope that your week is going smoothly.

I wanted to share another passion of mine.  DOMINOS!  Dom inos come in all shapes and sizes (including hexominos with six sides) I like to use mahjong tiles too!  I thought I would share a domino pin today with a time/clock theme.


To make this pretty pin all you need is a regular sized domino.  Stamp some clock images on the back (use a solvent based ink like StazOn).  Add some wire and brass charms.  Glue on some clock hands. And finish off with some glass beads attached to the sides of the domino.  Then wear your pin proudly!

Monday, February 21, 2011

Scroll Heart Jewelry!

Hi everyone! Happy President's Day!

As usual I started out to create one thing and ended up with something else!  Isn't that just like life?  Anyway, today I have jewelry made from shrink plastic and the scroll heart punch.

Shrink Plastic has been around for a long time.  It is a great material to use to make charms, jewelry, embellishments and so much more. 

Shrink Plastic comes in 8 1/2 x 11 inch sheets and comes in clear, white and black.  I used clear for my project.

To use shrink plastic, you need to prepare it.  Simply sand one side with a fine or semi fine sandpaper (I use one of those white rectangular nail buffers.) The reason you want to sand it is so that the color will stick to the plastic.

Once prepared, I used my punch and punched out an 11 inch border.  I cut out two hearts for my earrings and used a strip about 5 inches long for my pin. (I wasn't sure if my punch would go through the shrink plastic but it did very well.  Remember that the more detailed a punch is, the less likely you can use it on thicker material.)

After you punch or cut out your shape, all you do is use your choice of colored chalks.  Use a q-tip to apply the chalk to the plastic.  It's very forgiving so you don't even need to be exact.  One thing to remember: the plastic shrinks so the color gets a little darker.

Craf-T Chalk has come out with several series of beautiful colors.  With names like "Summer Sea", Earthly Wonders" and "Butterfly Kisses/Dragonfly Dreams" how can you resist getting one of everything!
I used Garden Blooms and the newest addition to the line Photo Tinting Chalks.

First I want you to see how I colored my hearts.  First I colored the whole heart in lavender. Then I used red to accent the insides of the heart.  I gently blew off the excess chalk (there is really very little chalk dust).
 I used pink and green on the border.
Once the shrink plastic was colored, I used a heat gun and a pair of tweezers (to hold the shrink plastic down while it shrinks).  The shrink plastic will shrink quickly.  Keep your heat gun on it so that you can be sure it completely shrinks and falls flat again.  You have about 3 seconds (really, 3 seconds) to make any final adjustments like curving it or forming it or flattening it before it dries hard as a rock.  You can keep it soft for a short while by continuing to keep it heated. 
Remember that it is HOT HOT HOT.  So, use your tweezers.  If you've never used shrink plastic before, it would be good to find a store that can demo it for you or provide you with hands on teaching.  Its easy to do, you just need practice the first time you do it.


Here you can see my heart earrings and the start of my bar pin at the top already shrunk.  Below the ruler is the original punched out border.  This gives you an idea of how much it shrinks.

 And here are the results!

I added some paper roses and brass charms to my pin.  I love things that dangle. I love the way they tinkle when they knock against each other. To complete the jewelry I added a pin back to the bar pin and posts to my heart earrings. You can get both at any craft store in the bead section.


Scroll Heart "I Love Paris" Bar Pin 


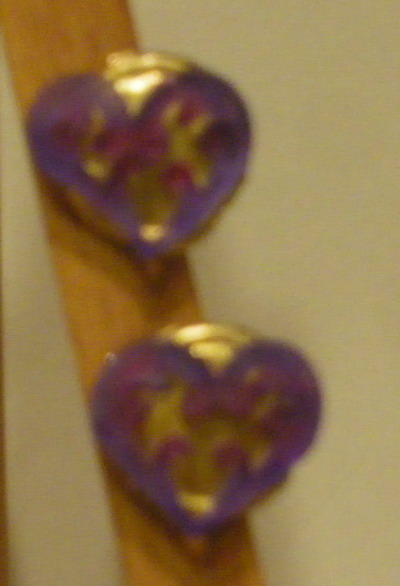
Scroll Heart "Wear Your Heart on Your Ears" Earrings

(sorry for the blurry image - I am trying to figure out how my camera can take better pictures)
 I really hope that you give shrink plastic a try.  It is a versatile material that will make anything special.