Pages

Sunday, December 30, 2012

Butterfly Card

I've been doing some coloring projects lately and wanted to share one that I did with patterned paper.  Usually coloring porjects are done with stamped images.  I've been playing around with patterned papers though and my cardss have been coming out well.

The card below is like a similar technique where the background is stamped in black and white and then stamped again on another paper.  One piece is cut out and colored and then overlaid onto the first stamped image to create a focal point.

In my card below, I used distress markers to color one butterfly in the patterned paper.


Close Up!

I added some glitter glue.


Lis

Saturday, December 29, 2012

Another Patterned Paper Card


Here's another card I made using patterned paper for the base and just added some silk flowers with brads.


Close Up!

You can see the gold dazzles line that I added as an accent on the left side.


I decided to extend the gold lines so that they crossed (an extra design element).


Lis


Friday, December 28, 2012

Ivory Card with Gold Border

I had the prettiest paper and wanted to use the scene in a card.


Close Up!

I added a gold border beneath the ribbon (german gold scrap).


Lis

Thursday, December 27, 2012

A Serendipity Paper Christmas Card!

Hi everyone!
What is Serendipity Paper you might ask?  It's paper you make from scraps! 

Have you ever wondered what to do with all those pieces of beautiful papers and cardstock that just aren't good for any project but you can't bear to throw them out?  This technique will show you how to make a new sheet of paper using all your scraps.

Rules:  Well...there are no rules!  Take any of the papers that you want, cut them into strips, tear them into pieces, and paste them on a piece of cardstock.  Although you can choose to keep within a color family or coordinate between basic colors and pattern mixes, you don't have to.  Somehow this always works out!  It's a little like paper magic!

Let's make some Serendipity paper!

1. As you can see, I chose a Christmas theme in red, white and green for a color theme.  I normally don't do this but it's the season. 
  • patterned paper
  • solid cardstock
  • solid cardstsock Co'ordinations kraft


I embossed the solid cardstock. I've never done this before and I wanted to see how it would come out.  I'm a mad scientist sometimes.


2. I ripped the papers into strips with torn edges on both sides.


3. I started gluing my strips randomly onto my piece of cardstock.  Cardstock can be anything, even a scrap itself.  The color doesn't really matter because we are going to cover it with our pieces of paper.  (Note: Since I have strips, they naturally lend themselves to gluing either vertically or horizontally.  I try not to follow a pattern when I'm attaching my pieces.  I also use a glue stick.  For me, torn paper seems to look better when glued down with a glue stick.)


4. Here is my finished piece of cardstock with all my pieces glued down.


5. I used several different sizzix dies to cut out some shapes with my paper.


6. And here is my finished card!  What do you think?


Close Up!


I hope that you have enjoyed learning about this technique.  And that you try it out too!

Lis

Wednesday, December 26, 2012

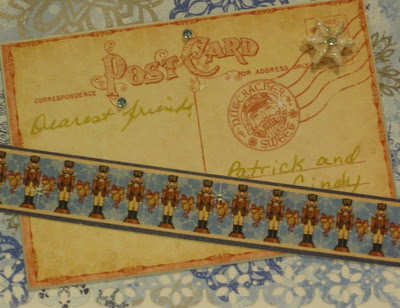
Christmas Cards using Post Cards

Hi everyone! Last Christmas cards of the year! I wanted to share these with you. I used the Graphic 45 Nutcracker Suite papers again. There was a page with tags and post cards that you could cut out. I thought this was a good use for them. Enjoy!
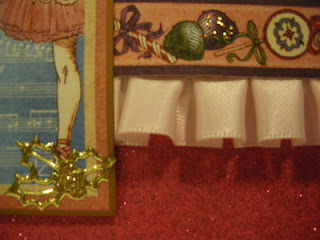


I punched a border design at the bottom of my mat. (My card base is white cardstock.)


I added some jewels and a snowflake sticker to finish.


Well, another year over!  Hope your 2013 is blessed.

Lis

Tuesday, December 25, 2012

Merry Christmas and Peace on Earth...


Wishing each of you love and joy, and happiness.


Merry Christmas
Feliz Navidad
Joyeux Noel
Froliche Weinachten
Buon Natale
 
Lis


Monday, December 24, 2012

Winter Wonderland


I recently purchased an embossing folder from Frantic Stamper.com.  What attracted me to it was that it was a whole winter scene including house trees snow and path.  Here it is below.


Close Up!
To add dimension, I attached one of the holly leaves behind the Happy xmas sentiment and the other on top.

Thanks for stopping by!
Lis

Sunday, December 23, 2012

Washi Tape Christmas Cards

I went by Michael's the other day and they had some washi tapes for sale (50% off I think it was). Anyway I saw this really nice red plaid and got a roll.  Here's what I did with it!


The card has thrree rows of plaid, one of gold at the bottom and a different patterned tape in the middle.  The top row of plaid washi has been cut to fit the card ( I added it and just trimmed off the excess.).

The JOY is from a Martha Stewart punch.  I punched it in red foil paper and trimmed the bottom edge to 1/8 inch.

Close Up!


Lis

Saturday, December 22, 2012

Ornaments Card

I just recently got this Dazzles ornament sticker pack.  It gives you three colors (gold, red and mat green) of the same ornaments. You pick and choose which pieces of what colors you want and put together the ornaments in different colors.  Pretty nifty.

I decided to emboss my card and then added some torn paper.  I also added the green washi tape accent to the binding of my card.


Close Up!

I love the script style of these stickers.


These hanging chain stickers come with the pack.  If you look closely yo can see some silver dots along the chain.  So pretty!


See you tomorrow!

Lis

Friday, December 21, 2012

Simple Christmas Cards

Hi everyone!  Are you counting down the days until Christmas?

Today's cards are from Hot off the Press Christmas paper kits.  I loved the die cuts so much that I bought the kits - normally I dont buy kits.
I love the colors and all the foiled die cuts!


I added some Liquid Pearls on the tree trunks for snow.

I colored a toothpick and stuck it in the chimney with the banner.


Come back soon!
Lis

Saturday, December 15, 2012

There are no words...

My heart goes out to Newtown and those lost.  Our hearts are broken but not our faith.

Sugar Plum Fairy Christmas Card

I've been doing not so ordinary color combinations for cards lately. Today's card is for pink lovers and Christmas lovers too!

It's hard to see in the photo but the card is matted with a pink glitter cardstock (onto a white card base).


Close Up!

I took the images from Graphic 45's Nutcracker Suite paper.  I added glitter glue to the wings of the fairy and also to the sugar plums on the border.


I love this pink ribbon.  It's perfect for ballet.

Come back again for more inspiration!

Lis

Friday, December 14, 2012

Merry Christmas Shaker Card

Today's card includes a shaker component!


First I made my window.  Simple with Frantic Stamper Precision dies - the pattern below is a single die. 
Steps:
  • Used a Precision die to cut the window pattern out of the front of my ivory cardstock base
  • I used the same die to cut a window pattern out of some beautiful purple patterned cardstock (Graphic 45)
  • I ripped my purple paper into two sections and attached with glue stick
The shaker box:
  • Ranger/Tim Holtz Memory Capsule (small fits the one inch window perfectly)
  • I cut a square of dark green paper for the back
  • I added a pinch of Mica Snow to my capsule
  • I sealed it with Glossy Accents
  • I opened up my card, added some glossy accents around the edge of the window I was using and glued the shaker box/capsule in

  • Embossed some gold foil paper with snowflake pattern and used this to back the windows
  • I decorated with some Festive Greenery (die) in green foil paper.


Close Up!

I love these Dazzles!  They have a glittery gold in them.

Here is a close up of the shaker. Very simple with Tim Holtz technique!  I filled it with Mica Snow.

You can see the embossed gold foil background I used.  I made the snowflake myself with a punched snowflake in ivory cardstock and then added pearls.


Come back again for more Christmas card ideas!
Lis

Saturday, December 8, 2012

Christmas Poinsettia


I started out today wanting to make a window card which I kind of did.  I ended up with a window as a backdrop for a center ornament. I thought it turned out quite nice.

I started out with what you see below. I know the cut out of the window looks dirty but its because I photographed it against some dark items. That's the shadow. 

I do like how the gold dazzles came out. I have recently become addicted to using them.


I used two sizes of precision die squares.  This was run through my cuttlebug three times to get the cuts.

Now for the card!


I colored the poinsettia leaves with Festive Berries and Evergreen Bough.


Close Up!

I used Stickles glitter glue on top of the leaves (I rubbed them in with my finger) to get the sparkle.  I made the poinsettia using Tim Holtz Poinsettia die. Each layer is foam taped to add dimension.


I hope you enjoyed my card.  Come back again!
Lis

Friday, December 7, 2012

Christmas Kitty


Today's card is made with Precision dies by Frantic Stamper.  I really like these dies!  Although squares have been done alot, I think these are a fresh take on thin dies.

Christmas Kitty:


Close Up!
The stamp is from Stampendous.  I love this little kitty with the santa hat on.  I colored the hat with gel pens and the cat with distress ink pens.

This ribbon is called crush.  It's a little like organza and rough silk...if that makes any sense!

This writing stamp I used is in old German Script.

Here is the inside of my card.


Come back again for more Christmas cards!

Lis