Pages

Friday, October 31, 2014

A Rose for Halloween Card

I've been working on a few Halloween cards.  Halloween snuck up on me this year!  I haven't done too many.

Materials:
  • Graphic 45 Steam Punk Line
  • Sizzix Die (cut in silver glitter paper)
  • Paper rose bud (Wild Orchid Crafts - if you like paper flowers, check these guys out)
  • Black grosgrain ribbon
  • Black leaf ribbons (Frantic Stamper)

The card is really simple to make. I layered my two papers and used the black ribbon to hide the seam. 

I die cut the silver thing (I don't know what to call it - it looks like a frame and mirror to me)
and then made my rose. I folded the wire from the rose in half and then put a small bead of glue on one side. I rolled the leaf ribbons around it.  Now that I am thinking about it though - it would have been easier to wind some double sided tape around it and then wind the ribbon around that.


Have a safe and Happy Halloween!
Lis

Thursday, October 30, 2014

Pumpkin Greetings - a Halloween Card

Don't you love this card?

Materials:
  • black card for card base
  • gold ripple holographic card from hot off the press
  • black and white (I believe they call it licorice) bakers twine
  • green card stock (this is from Graphic 45)
  • Pumpkin Greeting (old fashioned) from Tim Holtz Salvage Stickers - Holidays
  • one embossing folder of clocks (Sizzix)
  • purple foil adhesive backed
My card starts off with this luscious purple foil.  I cut it to 4 x 5 1/4 inches and attached it to a scrap piece of card stock.  I ran it through my cuttlebug to emboss it.  (The reason I backed the foil with cad is to make it stronger and so that the embossing would stay crisp.)

I attached my purple piece to my card, and added the rest of my items. Easy!

Come back tomorrow for my best Halloween card yet!

Lis
 

Wednesday, October 29, 2014

The Halloween Spider - a card

This week is busy busy for everyone as we all make the final adjustments to our costumes for Friday night! OOooOOOOooo!
 
This Halloween should be fun because it IS Friday night and no school next day!  What fun!
 
Today's card is a cute Halloween Spider and web.
 
Materials:
  • black card for card base
  • black shimmer paper for the cobweb
  • a cobweb die
  • white and oh yes a couple of red crystals for the spider's eyes


As you can see its a simple card but effective.  Add a greeting on the front or inside!

Stop back tomorrow for another spooky card
Lis

Tuesday, October 28, 2014

Halloween Sugar Skulls Card


I live in Southern California.  there is a strong Mexican culture here including Day of the Dead where the memory of beloved family members are honored.  Part of this is the making of decorated sugar skulls. That is the inspiration for my card today.
Frantic Stamper has a great set of skull dies. You get three in the set, in different sizes which is great!  I used the medium size for my card.
I started by preparing my card I used a black card stock for my base. the orange patterned paper comes from KaiserCraft's Outdoor Trail Collection (which shows that you can use many papers for different themes than were intended!).  I added orange ribbon and another piece of card stock from DCWV.  I made the banner from Tim Holtz Banner die (Sizzix) and added some paper poppies to top it off.
 
 
I cut two skulls from red foil card stock and two from white shimmer paper.  I added them to my card with glue.  Now the fun begins!  I chose some Liquid Pearls and some glitter glue and started decorating!  I think I will make another card and use gems the next time.
 
 
I hope you enjoyed my card today. Lis


Sunday, October 26, 2014

A Midnight Dreary, a Halloween Card


This is a very easy card to make and SO beautiful because of the die I used. 
I love birches ad the Frantic stamper birch die is wonderful!  It is a card panel so it will cover an A2 card.
 
To make my card, I first cut the birch panel out of plain white card stock.  then I used Versa Mark and silver embossing powder to change my birches to silver.  I had some blue glitter and some blue chunky glitter and reheated (melted) parts of the embossing and added the glitter to it.  This causes the glitter to stick to the melted embossing powder.
(I had in my mind a full moonlit night and the birches would be silver in the moonlight and also give off this blueish light...spooky, yes?)
 
After I added glue to the back of my trees, I placed a white shimmer moon (cut from shimmer paper) behind the trees.  I glued my trees to a black mat and again to a silver glossy mat to finish my card.
I have several ideas to share on this card for variations:
  • instead of a moon, use a skull out of red glitter
  • cut out a bat to lay on top of the trees with a Happy Halloween greeting in red or white
  • take an alcohol pen and color one tree t stand out from the group
  • add an owl to one of the branches
  • You can use this die for Christmas and add snow at the base or on some of the branches.
There are so many ways to use this birches die.  I hope you will give some of them a try.

Lis
 

Two more simple greeting cards you can make

Happy Sunday everyone!  Time to share two more simple cards that I've made.

The first one is rather bright. I used DCWV Spring card stock in bright pink and yellow.  I cut them into some strips and added them to a white card base.  I added a die cut (Frantic Stamper Accolades).  I topped it off with a single star embellishment from Tim Holtz Idea-ology.


I like the clean crisp lines of this card against the ornate swirl of the greeting.  I think I just got lucky and it all went together well.


I really like how the next card came out.  It's a Happy Anniversary card (or any celebration you want) done on a white card base and a light blue-green mat with matching ribbon (Anna Griffin die).


I added the strip of white cut out (Frantic Stamper Shell Half Panel ).  The pattern is really nice and you can use the half panel twice to get a cut out on the entire front of an A2 card.  I backed it with blue patterned paper.


I hope you enjoyed my cards this weekend! Thanks for stopping by. Comments are always appreciated!  Lis

Saturday, October 25, 2014

Two Quick greeting cards for friends

Lately I've been making simpler cards.  Two to three layers, not a lot of embellishments...I wanted to share a few with you that I like.

First up, a greeting card to say hello:

I created this card using two patterned papers.  I covered the seam with a die cut (from Sizzix called Chained - its very cool - check it out HERE.), some bling and a rose.  My card base is black card stock.  It really sets off he black background on the patterned paper.


The chain was cut using shimmer paper in copper.
 

Next up: Happy Birthday Friend:

Again, I used three patterned papers cut in different widths (brown card for base).  I added a die cut (Anna Griffin die) in copper shimmer paper.  I added the greeting vertically.


Thanks for stopping by!
Lis

Sunday, October 19, 2014

Autumn Owl


Today's card uses a too cute owl die by Frantic Stamper.  Owls are so popular and Frantic Stamper has a set of two plus a branch.
I started out with an ivory card base.  I used the Dazzling Diamond Border to create a border design on the bottom front of my card.
To create my card I used some green pattern paper from Basic Grey.  I glued this to my card front just above the diamond border.  I cut out two sets of branches, one in dark brown card stock and one in kraft color card stock.  I layered the branches with the dark brown in back to create some dimension and glued them in place. I added two maple leaves that were cut from the Leaf Windows. These were cut in brown fireworks card stock.  I added these to the branches using foam tape.  I added my little owl so that one of the green stripes from the patterned paper showed through the eyes to give him eye lids.


I created my tag using the largest die from the Flag Trio.  I cut this from the brown fireworks card stock.  I had some "wood" paper and used this to die cut the word AUTUMN. I also used it to mat the flag.  I added some brown ink to the edges of my word then I attached the word Autumn to the flag using foam tape. I also foam taped the entire sentiment to my card. I added some tiny beige pearls to the "t". 


For finishing touches I added some Washi Tape and a Burgundy ribbon.

For the inside of my card I added Burgundy suede paper at the bottom of my card.  This really showed off the diamond border on the front.

I hope you enjoyed today's card.  Thanks for stopping by!
Lis


Saturday, October 18, 2014

Autumn with Hummers


Autumn with Hummers (November Sketch Challenge)
by Lis Whiting

I love suede paper with it's rich colors and luxurious feel.  I used a Frantic Stamper doily die to and purple suede paper to cut my doily. I used glue stick to attach my suede paper to my card. You would think that suede paper is tough to attach something to but it's very easy to work with.  To add the glue stick to the back of my doily, I tapped the glue stick rather than swiped it.  This avoids any bild up in the intricate cuts! I added hummingbirds and the word "Autumn" using gold foil card stock.  My background paper is from Graphic 45. I love the old world feel of this Line.  I was a bit daring and used a bronze glitter card stock as a mat for my card front. My card base is ivory. 


Products used:

Sunday, October 12, 2014

Object D'Art Card


I've been focused on panel dies and layered cards lately so that is how this card came about.  I so adore the Southwest panel that I am still using it in a lot of my cards, including this one.  I chose some dies that would lend themselves to a collage piece.
I chose to use an ivory card base because I think this color really adds to the vintage and collage feel that I'm going for.  I decided on a pretty mat of light blue with flowers and did the southwest panel in a dark blue for contrast.  I also cut a southwest panel out of some kraft with violet foil design on it. I cut this up and added the middle to my dark blue panel (I wanted to lighten the card up). You can clearly see the design below in this close up of the greetings card.
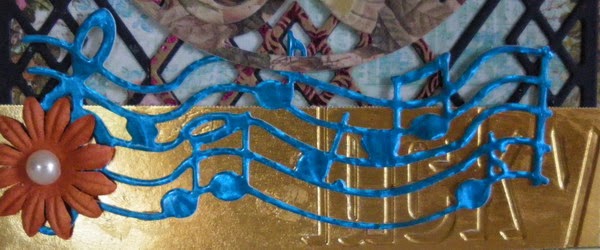
I also chose the Musical Score die (cut from blue holographic Paper) and one of Fran's medallions (cut from a patterned paper with some of the innies glued back in). I added some flowers in the center.
 
 
You may have noticed the gold foil strip underneath the Musical Score.  That has been embossed with one of Tim Holtz' new embossing folders "Lucky".
 
Here's another look at my finished piece, all ready to mail to my dad!
 
 
(You can really get a good look at the medallion and how I "re-pieced" the cut outs to form hearts.)


Saturday, October 11, 2014

Scary Halloween Card


YEA!! It's time for the holidays again!  And that means holiday cards!! (Can you tell that I just love this season?)

So, since Halloween is first up, here is a Halloween card for you with a surprise inside!

The card base is black card stock. Onto that I matted some gorgeous holographic stars card stock in gold and some pretty leaf print card stock. I made the leaves using an EK Success punch that can punch either the whole leaf or parts of it. I used the holographic starss card stock on the leaves also.


While the outside is pretty, the INSIDE is pretty spooky!


I used Frantic Stamper's own pop up die for the cemetery. Its very cool! I cut the pop up from gold glitter card stock. It cut very well and as you can see the images are crisp. I also used a tree die for my tree. I cut it out twice in two different colors so that I could give it a shadow. I used another EK Success punch for my Jack O Lantern. I added "leaaves" cut from brown and gold leaf ribbons that I had. Finally I added a big moon in the background (I used a white star dream paper for this). You can see a little gold glitter bird in the tree. This is actually part of the cemetery die. The bird is on one of the tombstones but I cut it off and put it in the tree.

Thanks for stopping by! Lis


Products used:
Frantic Stamper Die:  Pop Up Graveyard,  Mix n Match Leafless Tree,  EK Success Layering Punch: Jack O Lantern, Hot off the Press Holographic Paper Gold Stars


Saturday, October 4, 2014

Cowboy Bracelet


YEEHAA! (Sorry, I couldn't help myself!)

Today's project is a cute bracelet with icons that represent our cowboys - boots, hats and horse shoes!

These cute decorations were made using shrink plastic, Spectrum noir alcohol ink pens and Frantic Stamper Precision Dies (Here is the set that I used if you are interested: Cowboy Accessories - three die set  FRA-Die-09123) .

These dies were a little trickier to use with shrink plastic.  I found that I needed to hold my heat gun over the individual die cut 3-4 inches and heat the entire piece at once in order for it to turn out really well.  Although I did use the alcohol ink pens before I heated my shrink plastic, I also usd them for touch ups afterwards.  Also, since this is alcohol ink, I didn't bother to sand the shrink plastic before I colored it.

Once I finished the shrinking and coloring, I took some gold tone jump rings and used them to attach my charms to my bracelet.  Since the die cuts already had holes in them I didn't need to punch any beforehand.

I really like the way that the boots turned out.  The colors and the look of long wear really fit these boots!


I wanted something colorful on my bracelet o I chose to make the horseshoe blue.  The horseshoe didn't really have any holes bigg enough to string a jump ring through so I wound some gold tone wire around the horseshoe and created a loop to attach to my bracelet.

I hope you enjoyed my cowboy bracelet. Now go make one of your own!

Thanks for stopping by!
Lis