Pages

Monday, December 2, 2013

Homemade Gift Wrap with Lumiere Paints - Just in time for Christmas!

I would like to show you all a technique that I learned years ago that turns an ordinary paper lunch bag into beautiful gift paper.


First we need to gather our supplies:
  • rubber gloves (not critical but recommended)
  • foam brush
  • 1-2 paper lunch bags
  • a couple of popsicle sticks (to stir the paint)
  • Lumiere Paint by Jacquard in Bright Gold
    • Lumiere Paint can be found at your local art supply store and sometimes at Michael's
  • Neopaque Paint by Jacquard in Black
    • Neopaque has no shimmer or pearl.
  • Spray bottle with water (any kind)
  • scissors
  • a flat place to work & a flat place to let your paper dry

     1. Cut the bottom off your paper bag and cut the side to open it up into one sheet.
    2. Crumple your paper up into a ball.
     3. Open up your paper and smooth it out again. Then lightly spray the front and back with your water spray. Do not get it dripping wet.  A light mist to cover the paper is fine.  It should be enough to get the paper damp.

     4. NOTE:  An interesting thing about paper: the wetter paper gets, the weaker the fibers (conversely the drier paper gets the stronger the fibers). SO - be careful with your paper now - it's wet. Crumple your paper up again after you've sprayed it.  Smooth it out again. (By doing this you are breaking the fibers of the paper.  It makes the paper softer so that when you start using it to wrap your gift or make a card, it will be more pliable.)
    5. Mix up your Lumiere paints with the popsicle sticks.
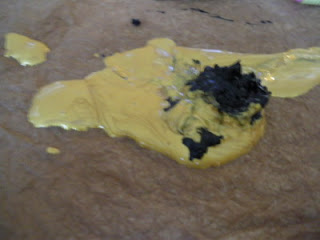
    6. Pour out first one color and then pour out the other color onto your paper. (As you can see here, my black paint is clumpy.  Actually it was really thick when I opened my jar - old jar.  Not to worry, I sprayed some water and stirred it up.  Good as new.
     7. Take your foam brush and spread the paint over your paper.  The colors will mix.  I added some more gold on top of the first coat to add some streaks.
     8. Here is another look at the paper after I finished painting it. After I finished painting my paper, I used a heat gun and dried it (front and back). I'm a little impatient!  You can also let the paper air dry over a few hours. (Once dry, I trimmed the paper edges. Now the paper is ready to use.)
     9. I decided to do two different mixes.  I used bright gold and pearl magenta for the paper below.
     10.  I also took a kanji stamp and placed my dry stamp on the paper to reverse stamp.  With this process, I removed some paint from my paper.  What you see below is the brown kraft color.   I used this stamp to create a design on my pink paper.
     11. And here are my homemade papers, wrapping gifts for my sister's birthday, ready to go! (Although the kanji design is faint, you can see it on the wrap.) The crumpled paper patterns really add to the sheen and texture of this paper.
     12.  Here is a close up of both the black/gold and the magenta/gold papers.
I hope that you enjoyed my homemade gift wrap technique!

See you later!  Lis

No comments: