Hi everyone and welcome to the weekend and the start of the Holiday Season! The year is flying by and I am working on Christmas and Thanksgiving cards which I hope to start sharing with you next weekend! So stay tuned!
Today's card is one I created for my sister. It's her birthday this month. She doesn't look at my blog so I am safe sharing this card with you!
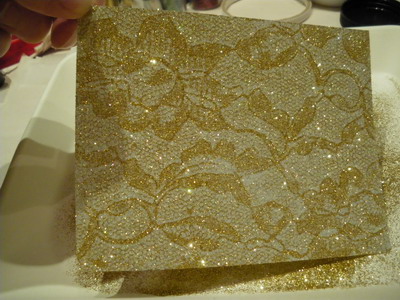
The background paper is from Penny Black. If you follow my blog you know that I've mentioned her papers quite a few times. She doesn't have very many but there are four in particular that she makes that are out of this world. They are all foiled and come in either white/gold or brown/gold (as you see below). The choices are music (like below), mini flowers or damask. And all are wonderful. I will be using a lot of the white music for my Christmas cards this year.

The center paper is from Graphic 45 (of course! How did we ever live before they came along!) I believe it is from the Circus collection.

Close Up Close Up!!
To make the tickets more realistic, I took a small hole punch and punched half circles at each end of the tickets.

I love using jewels and pearls (who doesn't?). I put in one red heart to symbolize the love I have for my sister.

I used bright purple and pink ribbons for this card.

I have a point and shoot camera (not a fancy one with all kinds of lenses). I wanted to try a "fancy" shot. How did I do?

Well I hope you liked my card! Come back next weekend for the start of my Christmas cards!
Lis
Today's card is one I created for my sister. It's her birthday this month. She doesn't look at my blog so I am safe sharing this card with you!
The background paper is from Penny Black. If you follow my blog you know that I've mentioned her papers quite a few times. She doesn't have very many but there are four in particular that she makes that are out of this world. They are all foiled and come in either white/gold or brown/gold (as you see below). The choices are music (like below), mini flowers or damask. And all are wonderful. I will be using a lot of the white music for my Christmas cards this year.

The center paper is from Graphic 45 (of course! How did we ever live before they came along!) I believe it is from the Circus collection.

Close Up Close Up!!
To make the tickets more realistic, I took a small hole punch and punched half circles at each end of the tickets.

I love using jewels and pearls (who doesn't?). I put in one red heart to symbolize the love I have for my sister.

I used bright purple and pink ribbons for this card.

I have a point and shoot camera (not a fancy one with all kinds of lenses). I wanted to try a "fancy" shot. How did I do?

Well I hope you liked my card! Come back next weekend for the start of my Christmas cards!
Lis