Pages

Tuesday, May 28, 2013

Technique for using the Doily Stamps

I wanted to share soemthing I've been experimenting with.  I really am into a doily phase.  I love all the doily dies, punches and stamps that are out.  I love using gold doilies that you can buy.

So, I have these doily clear stamps.  These are unique to Frantic stamper.  Fran got these remade and is the only company that has any left.  They are gorgeous!

This is the My Mind's Eye Stella and Rose Gertie Clear Doily Stamps.  Click HERE if you want more information. Remember that My Mind's Eye is not producing these anymore. You can only find them at Frantic Stamper.


I took some blue card stock (plain) and, using Versa Mark, stamped a large and small doily all over the paper.  Then I used fine gold embossing powder and embossed the stamped images.

Look at the detail of these stamps!  WOW! (This would be a great back ground for a card all by itself.)

I cut my paper down to 2 x 5 1/2 inches. 

I used one of my corner chompers (any corner punch will do) and added the corner design.   Now I had a tag or embellishment piece for my card ready to go.

Lis

Sunday, May 26, 2013

Embossed Cameo Card

Hi everyone and happy Sunday to you all.  Today's card is a simple one.
1. embossed gold glossy
2. add a ribbon
3. add embellishments

The embossing folder was a gift from a friend of mine in Florida.  She got it as a free gift in the Australian Simply Cards magazine - Issue 41.  This magazine always has something for free inside. Usually its either papers or cling stamps. When she told me about the embossing folder, I asked (well actually I begged) her to get another one and send to me. And she did! I know that Michaels carries some of the foreign craft magazines.


Close Up!
To view the incredible number of cameo choices go to www.franticstamper.com or click HERE!

I thought the left cameocould be veritcal but I was mistaken.  It's a mermaid lying on her side so it should be horizontal.  I will probably replace her with another cameo.


Thanks for sharing your Sunday with me!  Drop by again next weekend!
Lis


Saturday, May 25, 2013

Silver Filigree Heart

Hi all and Happy Memorial Weekend.  Thank you to all who have served our great country.

I just got a new heart die from Sizzix. they are called Thinletts. I thought it wasn't going to be too impressive. When I got the package the dies themselves (this was a set) were inside a plastic envelope which was nice for storage.

It was a little difficult getting the first die cut out of the die.  I've read a tip about using waxed paper for the intricate dies. I may have to try that. These dies are getting more and more intricate and I'm starting to have some trouble with some of them.

Anyway, the die cut is pretty. I will try using transparency behind the next one and try out a stained glass look.

Close Up!
 I wrapped one of the leaf ends around the center of the bow.


Stop by again soon!

Lis


Sunday, May 19, 2013

Happy - a Card

Today's card is made with Frantic Stamper Dies and a torn paper technique (an oldie but goodie).  I also used the PRIMA Art Journal Pages paper pack. It's full of soft pastels and pretty designs.


Close Up!

Here is a side view.  I really wanted to capture the dimension of the ivy, especially the pink layer.
 Here's a great close up of how I layered the ivy.  I originally cut the green and pink versions from the one die.  I adhered the green ivy to the card.  I cut pieces of the pink ivy, added mounting tape at the base of the leaf only (glue stick on the rest - no glue at all on the ends of the leaves), and adhered them.

I curled the ends of the leaves and added little clear crystals.

Here's a good view.


Hope you enjoyed this card. It's one of my favorites.  I love the pastels and the ivy.

Lis


Saturday, May 18, 2013

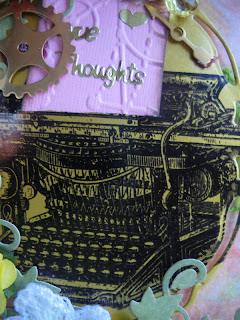
Love Thoughts Card

I've seen some really beautiful shabby chic cards and scrapbook pages that have flower sprays.  I've not done a spray so I wanted to do one on a card.  I added a little bit of steam punk to it also.

I like how this card turned out.  There's a lot to see with the flowers and the brass charms I added.  I used some acrylic flowers as well as paper and ribbon flowers.


Close Up!

There;'s a lot of dimension to this card!


I loved adding all the different brass charms.

Most everything was glued to the card using a hot glue gun. I used pop dots (thick glue dots) for the heart, glasses and top hat because the charms were not flat on the back and I didn't think that hot glue would work well.

I was going to use an old photo on the gold glossy but decided to use this old typewriter stamp.  I slit the top and added embossed pink card stock with :love thoughts" in dazzles on it. (Isn';t the little gold heart cute?)

I ran across these Roman numerals (I think from Prima).  I love clocks, numbers and gears!

One last look!


I hope you enjoyed my card today!

Lis

Sunday, May 12, 2013

Eiffel - a card

Today I want to share with you a card I made using Frantic Stamper new dies.  I love these dies and as soon as I got them I started playing with them. 

I wanted to do a collage card with the flower swirl and Eiffel Tower dies.  I have this great chandelier stamp that I used also.  I added the gold border at the top.


Close Up!

 You can see how I placed the tiny clear crystals on the tower.  The way its designed makes it easy.  I also love the little hearts that are part of the design.

Here is another (and wider) look at the tower and the flower swirl.  Did you know you can cut off the flower and use the swirl by itself?


Thanks for stopping by!  Come back again for more ideas on Frantic Stampers new dies!

Lis

Pink Bow Ties

I participated in a challenge to create a pink and brown card.  I really like this color combination so I wanted to create anther card and here it is.

I had fun adding the decorations of pearls and gems to my card when I was finished with the main design.  (I have to admit that it makes it easy when they come in a sheet with many sizes!)


Close Up!

Here is a closer view of the decorations.


Thanks for stopping by!
Lis


Saturday, May 11, 2013

Just a Note Card

I really love the way this card came out.  I used a Spellbinder die and also a Sizzix Sizzlets strip die for the cherry blossoms and branches.  The pink ladies are die cut from pink suede.


Close Up!

I really struggled with whether to use pearls or pink gems on the flowers. I finally decided one pink gem.  I didn't want to draw attention away from the main part of the card.

I used Dazzles for the sentiment and cut out the post card from a piece of 12 x 12 patterned card stock.


I  backed the card with Authentique.    Also, don't you love this gold glossy?  I die cut it from a Spellbinders Fancy Oval set - to die for!

Here is another angle of my card (It's hard to type right now because my kitty Miss Lovely is on my desk trying to sleep on my arm...of course I'm trying not to disturb her! LOL)

Thanks for stopping by!

Lis


Friday, May 10, 2013

Black Tie

I am excited to show this card!  Its actually very simple being only two layers.  The card base is black card stock, the mat is done in gold foil (embossed) and the embellishment is a simple bow tie done in black ribbon with some large rhinestones added at the center. ( You can see a bit of my reflection in the card as I take the picture.)


Close Up!

Here is a close up of the bow tie.  I used one of those adhesive strings of acrylic gems around the ribbon center.
Its also easier to see the embossed gold foil background. There is quite a lot of dimension to it. the picture doesn't do it justice.  It looks coppery in this photo but in real life its a buttery gold.


Thanks for stopping by!
Lis

Sunday, May 5, 2013

Thinking of You Cameo Card

I wanted to share this quick card using a cut out cameo die from Sizzix.  The card is simple to make using an ivory card base and a brown card mat.  I used pink suede paper and die cut the cameo image using a Sizzix Movers and Shapers die from Tim Holtz.

I added the sentiment (Dazzles) and a pink ribbon. I did add a tiny white pearl on the cameo as an earring.


Close Up!

I backed the pink suede paper with dark brown card which you can see in the cameo die cut.


Thanks for stopping by!
Lis

Saturday, May 4, 2013

Jeweled Flower Card

Today, my cards focal point (can you miss it?) is a jeweled flower.  I love to add jewels and pearls to my work.  I just think its so beautiful!  Nowadays, I don't need to use a toothpick and glue pot the way I used to.  Today's jewels are already adhesive backed and come in so many colors and shapes.  I am glad that they are making available the 2mm and 3mm sizes. I just love using them!


I used a turquoise card stock for my card base and then used a pretty patterned paper from Graphic 45 (Secret Garden). 

To make my flower:
I used two EK Success flower punches.  I punched the larger one out of shimmer cardstock in champagne and gold glossy, & the slightly smaller one out of gold glossy.

I used a double layer of mounting tape between the three layers after I curled the petals.  Once everything was attached I started adding my crystals and pearls.  I added the green crystals to simulate leaf color.  I chose a more open flower for the top to let the champagne color show through and to give the flower a lighter, airier look.


Close Up!

Here is a really good look at the 3 layers of the flower, and the jewels and pearls placement.

I added 2mm pearls randomly on the card (not too many).


This side view gives you a good idea of the depth of the card.

I hope you enjoyed my card today.  Stop by again for more inspiration!

Lis

Father's Day Card

Hi there!  Since Father's Day is coming up, I thought I would share a quick Father's Day card with you!


I used Authentique's STRONG collection, full of muted blues, golds and greens.  I really like the die cuts. They shaped them like postage and all have that really cool postage edging to them.  (Anther thing I like is that one of Fiskars decorative scissors is postage also so I can even make my own!)

I edged the DAD die cut with gold which I thought turned out really great.  I adhered with mounting tape.  I also edged the larger die cut with gold.

Here is a good view of the levels.
Happy Father's Day in advance!

Lis

Thursday, May 2, 2013

Lovely Violet Suede Paper Greeting Card

Hi everyone! I'm sorry that I missed the last weekend posting.  But I've made up for it with a beautiful card I created.  Take a look!

I love how this card turned out.  I've been playing with suede paper lately.  This card uses purple suede paper (a deep rich jewel tone).  I embossed it.  Suede paper takes embossing really well. There is another picture of the inside of the card that also shows the embossing really well.

I made the front of my card using some patterned paper (Authentique Strong Collection) adhered to my card base which is ivory cardstock.  I used a template to cut the right edge on my card and shape it. (If you're interested, Paper Wishes has these Design Tool Kits on a key chain - very cool. Click HERE. I get nothing from this company - I just like to share items that are useful or beautiful.)


Here is a good look at the embossing I did on the suede paper.  This suede paper cuts like paper and went in my regular embossing folder and through my cuttlebug with no issues.


 I used brown chalk ink to edge the front of my card.

Thanks for stopping by. I hope you enjoyed this card!

Lis